Who's Ready for Autumn? This Girl!

Autumn has finally showed her face and I am SO ready for the yummy treats that she brings!

October brings the scents of apples, cinnamon, pumpkin, and sweet potatoes and those flavors are most definitely on the menu for my blog this month. To me, these smells bring a homey feel to my life--just like that pumpkin spice latte that I get from Starbucks and the apple pie that I eat on Thanksgiving. Even though I hate when the weather gets chilly, these flavors definitely bring joy to my world!

Last Saturday, we went over my cousin's in Potomac to celebrate his 21st birthday and my aunt had asked me to bring the cake. I had no objection to this! Even though my specialty lately has been cupcakes, I was very interested in trying out a two-layer cake for the...second?...time. These cakes make me NERVOUS. My worst fear is one of my desserts falling apart and then next on that list is tasting so dry that ya never want to eat something from Liv's Bakery ever again. I can't say that the last worry has ever been a problem over the past five months...but the first one has been present and unfortunately, happened this time.

I decided to be festive and make a double-decker-snicker-doodle-apple-cinnamon-party-in-your-mouth cake for the get together. Everyone loves snicker doodles (if you don't then something is for sure wrong with ya) and everyone KNOWS cinnamon and apples go together like pretzels and chocolate...yes, one of the best combos. I found a recipe for a snicker doodle cake and decided to put cooked Gala apples (basically the filling of an apple pie) in between the two layers of cake.
 I cooked the apples for about 45 minutes on the stove with a half cup of light brown sugar, a few teaspoons of cinnamon, and a slab of butter. I was thinking of adding either cloves or nutmeg, but that reminded me too much of an apple pie and that wasn't what I was really going for with this cake. I simply wanted to successfully capture the flavors of apples and cinnamon. And that's what I did!

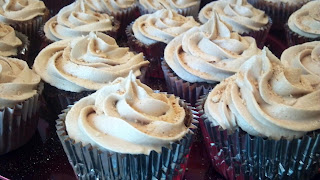
I iced the whole outside of the cake with the brown sugar cinnamon butter cream recipe that is on the recipe above. I used my new prep bowls to mix two different colors of icing--dark brown and rusty orange (that's actually how it came out and was utterly festive) for decorations. The tan butter cream, rusty orange, and dark brown went wonderfully together.

My boo-boo: The cake batter tasted DELECTABLE but when I took both cakes out of the oven, I decided--the distracted dummy that I was--to let them stand for only 5 minutes and then put them right on a flat surface rather than a cooling rack. They were both also upside down. This was a big no-no as one cake cracked almost completely in half. Good thing I did this the night before! So the next day, I made half of the cake recipe and it came out perfect that time :)

Next time: I would probably put more awesome-apple-filling in between both layers of cake because when it was cut at the party, some pieces only had a few small slices of apples in the middle.

What I LOVED: The icing was impeccable. My favorite flavor is cinnamon (with literally EVERYTHING) and there was so much of this in the whole cake. It was autumn in my mouth!

What did we do with the ruined cake?
Literally MOST of my roommate's doing. He sat in front of the cake, used my left over rusty orange icing, and chowed down with a fork! At least it didn't go to COMPLETE waste!


Just Another Manic Monday!

Monday Night. Bored. Still got work to do on my recipe. Who wants cupcake minis!?

Tonight was going to be round numero dos for Liv's "Hazelnut Coffee Lovers" cupcakes. Except this time, I wanted to use my brand new, Wilton mini cupcake pan! Thanks Mom and Dad :)

I've never baked minis before so it was definitely going to be a challenge. Or was it? Basically, I knew ya had to bake the cupcakes for less time, so how hard could it be? That was really the only difference...

I had some tweaking to do on my recipe and it still is going to need round 3 and probably round 4 and/or 5. I now realize how writing a recipe can take lots of effort and perseverance. I am determined to perfect my very first recipe! 


This is how I modified my first draft of my recipe (in italic):


1 cup sifted cake flour—sift first then measure
¾ tsp. baking powder
1/8 tsp. salt
1/3 cup softened butter
1/3 cup granulated sugar
2 large eggs
2 tbsp. canola oil (or full fat sour cream)
¾ tsp. pure coffee extract
2 tbsp. milk
I didn't have anymore sour cream so I decided to use canola oil (which essentially works the same and I'm not so sure which is better for you). I thought it had to be a TAD more moist so I decided to add some milk. Then, I balanced it out a bit with a little more cake flour. They STILL could have been more moist when they came out of the oven! I guess it does make sense now since I still kept the flour/oil/milk amounts balanced...should have just kept it with more wet ingredients. Oh well! That's why there is always round 3. I also added a quarter cup more of coffee extract which didn't really add much more flavor after all, unfortunately. They could still be more coffee-y! 

I baked the minis for 12 minutes and they came out perfect.

I whipped up the same hazelnut butter cream that I made last night and plopped a little on top! They are so cute, I love 'em! So quick and easy to ice and make a great picture. Going to take these to work tomorrow so I can get more feedback.


Liv's First Ever Original-Completely-Made-From-Scratch-Off-the-Top-of-My-Head!

I FINALLY DID IT!!!

Since the very beginning of my baking blog, everyone has been encouraging me to make up my very own recipe to post, write about, and sell. I finally did it!

I LOVE coffee (I literally have to drink a cup every day to stay alive) and hazelnuts are probably my most favorite kind to eat. You will also find me switching it up at Dunkin Donuts with hazelnut iced coffee and then at Starbucks with a hazelnut non-fat, no whipped, no foam hot latte (yup, I'm one of those folks!) 

Why not put the two flavors together into a cupcake? Why not do so during my very first time making homemade, from scratch, not even glancing at another recipe, experience!? 

I knew the basics of a cupcake recipe which made it that much easier to come up with my very own. 

I knew that sour cream, milk, and/or oil make a batter moist. 
I knew that flour thickens batters. Cake flour is even better! 
I knew that baking powder makes things rise.
Eggs are part of every recipe and make the batter smoother.
Butter makes cupcakes fluffier. 
I've never known what salt does to a recipe but I added some anyways!

Knowing all of these facts, I still didn't know how MUCH to add of each ingredient--this was the trickiest part of my journey.

I sat down and wrote out how much of each ingredient I THOUGHT I would need for about six cupcakes. I envisioned recipes in my brain that yield 12 cupcakes and thought about the most common measurements of each. I didn't want to make 12 so I cut everything down to what I thought would yield about 6 cupcakes. 

Here's what I came up with at first:
1/2 cup sifted cake flour
1/2 tsp baking powder
1/8 tsp salt
1/3 cup softened butter
1/3 cup granulated sugar
1 large egg
1 tbsp full fat sour cream
½ tsp pure coffee extract

Frosting:
¼ cup butter
(No idea how much yet) Powdered Sugar
(No idea how much yet) Hazelnut extract
(No idea how much yet) Milk

And so I began! Below are the directions I wrote out for myself.

Directions:
1. Preheat the oven for 350 F.
2. Line six cupcake cavities with liners of your choice
3. Sift cake flour and then measure it out. Combine the cake flour, baking powder, and salt in a medium sized mixing bowl.
4. In a separate mixing bowl, combine the softened butter and sugar. Cream the two together for about 2 minutes.
5. Add the egg and mix well.
6. Blend in the sour cream and coffee extract. Mix until creamy. 
7. Slowly add the flour mixture and make sure to scrape the sides of the bowl while mixing. Do not over mix as the batter may become "tough"
8. Using a spoon (I like to use an ice cream scooper), fill each cupcake liner 3/4 of the way with batter.
9. Bake for 18-20 minutes or until a toothpick inserted into the center of a cupcake comes out clean (or with no wet batter on it)
 
While making the batter, I noticed that it wasn't smooth enough and it would probably not make 6 cupcakes. I immediately realized more flour was needed. I added 1/4 cup sifted cake flour, 1/4 teaspoon baking powder, 1 more tablespoon of sour cream, and also 1 more egg. Surprisingly, the egg made a huge difference; the batter immediately became smoother/creamier. Since I was adding more flour, I had to add a bit more of baking powder to even it out. I got out my ice cream scooper and filled away. It made exactly six cupcakes with a teeny, tiny bit of batter left over! Woohoo go meeee!!!

I ended up baking for 20 minutes (I first put 18 on the timer) and they came out perfect. I let them cool for about 10 minutes and bit into one un-iced cupcake.

What I would change next time: I would only change a few things about my recipe. They could have been a tad more moist--no one likes a dry cupcake! However, I believe this is probably the trickiest part of perfecting a recipe. To do so, I would add maybe one more tablespoon of sour cream as well as about a 1/4 cup of milk. This would add moisture to each. I would also add a 1/4 teaspoon more of coffee extract to capture more of that rich, coffee flavor.

As for the frosting, it came out scrumptious! I made the well-known vanilla butter cream and added some hazelnut extract. I knew I wouldn't have known the exact measurements of powdered sugar, milk, or extract until I actually went to make it. I ended up with the following:

1/2 cup (1 stick) softened butter
2 cups powdered sugar
1/2 plus a dash of hazelnut extract
1 tbsp milk

Making the frosting:
1. Cream butter in a mixing bowl until smooth
2. Slowly add the powdered sugar, mixing well after each addition
3. Blend in the hazelnut extract
4. Slowly add the milk or whipping cream to the frosting until you feel that it’s the right consistency. My test: If the frosting doesn’t move one bit when you tilt the bowl, then it’s ready!
5. Pipe or spread icing onto the cupcakes and decorate as desired
I would probably not change a thing about the frosting. Next time, I may try a different type of butter cream that involves egg whites and regular sugar instead of powdered. I believe it would probably be less rich. Although, the richness of the icing adds A LOT more flavor to the cupcake that isn't too sweet to begin with.  

To make cupcakes fluffier: I may try to whip up the egg whites separate from the yolks and add one more egg white alone to the batter. I've read online that this makes for fluffier, lighter cupcakes!

That's all for now folks--I am very proud of my VERY FIRST attempt at making up my unique, most original, Liv's Bakery "Hazelnut Coffee Lovers" cupcake. This recipe will be tweaked, practiced, and perfected in no time. Stick with me!


Cheers!

How is it that I'm just now making my favorite dessert?!

My favorite dessert has always been cheesecake...go out to dinner and I happen to get dessert...the first thing I look for on the menu is cheesecake. Any kind. Strawberry swirl, red velvet, NY style, birthday-cake-party-in-my-mouth, or whatever kind of cheesecake you can imagine--I love.

It just so happened that my friend's dad's 50th birthday is today and he wanted me to make him a cheesecake. He said his dad LOVES chocolate so what do I choose to make? A chocolate obsession cheesecake--chocolate cheesecake, Oreo crust, chocolate ganache on top, and more Oreo's around the edge and on the rim. Talk about chocolate overload! This would give me a heart attack!! Well...not literally, but I'd definitely go into a food coma and probably not want chocolate for a really long while that's for sure.

Now I know that cheesecake is probably the worst dessert for anyone in all of mankind--does this stop me from ordering it out? No way!! I especially can't resist looking at the book of choices at the Cheesecake Factory. That is absolutely ridiculous! But really, who goes to the Factory and DOESN'T order cheesecake!? Hopefully no one reading this...

Anyways, I have never made a cheesecake before so I wasn't sure how to compare recipes online. I knew ahead of time that it has an out-of-this-world amount of cream cheese plus a generous amount of sugar and probably some milk or something to make it nice and creamy but thin enough to pour into the spring form pan. I ended up being wrong about the milk and a good handful of recipes I looked at had sour cream in them as well. Many recipes I glanced at were very similar so I went with one on a website that I was familiar with already--Joy of Baking. I've used a few of their recipes before and saw that this particular recipe had been tested so I went with this one! Click on the link to see what it's all about.

What I changed a bit: I decided to use Oreo's for the crust and edge of the cake instead of grahams. This was partly because the Mars by my apartment did not have/sell chocolate grahams for some completely odd reason. I think Oreos taste better anyways! This is really all I changed since it was my first time experimenting with baking a cheesecake.

First time for everything! It was my first time baking a full on, 10 inch, cheesecake. It was also my first time using a brand new spring form pan! This pan makes it SO easy to remove the cheesecake. Just pop and pull! I've also never made ganache before. I always thought it was something extremely elegant, fancy, and difficult to make. It literally consists of heavy whipping cream and semi-sweet baking squares. Talk about a piece of cake! First time's a charm!

Hope your dad enjoys this chocolatey delight on his 50th!!

Cheers!

Another Well-Deserved Learning Experience

FINALLY!!!

Reese's is probably one of the most loved chocolate delights in the U.S. You can even follow Reese's on Facebook! For the past 2 months or so, a friend of mine, and also co-worker, has been begging (yes, literally BEGGING) me to make something Reese's inspired. He even posted a link to some sort of Reese's brownie a while back on my FB wall. I have to admit, it looked super delish.

I decided to make a Reese's cupcake and ATTEMPTED to make peanut butter whipped cream (didn't go as planned) to go on top. I'm a huge fan of homemade whipped cream simply because it is SOOOOO easy and it's also light in taste compared to the rich and creamy butter cream that I usually make. Sometimes, I feel that a cupcake, depending if and what is inside of it, is too sweet after adding plain or flavored butter cream on top. Since this chocolate cupcake was going to have a Reese's cup on the inside, I felt that by putting PB butter cream on top at the end was going to be just too much going on. All of the sudden, PB whipped cream came to mind!

I decided to use the chocolate cupcake recipe that is in my Cupcakes cookbook (same recipe I used for my old co-worker's order a week and a half ago) because I never got to sample the finished product. After she told me everyone LOVED the cupcakes at her work cookout, I just had to use this recipe again to try it out. The batter (yes I try the batter EVERY single time I make anything) was delectable when I tried it last time, but a true baker ALWAYS should try the finished product to figure out what he or she should change the next time around. This, I feel, is an extremely HUGE part of learning how to create your own recipes and tweak other excellent recipes to make them unique. Going forward, I plan to always make one extra cupcake to sample no matter what it's for.

I simply added a small Reese's cup in the center of each cupcake (no, not the useless microscopical Reese's mini) and VOILA, the cupcake turned out perfect. After placing the mini Reese's, I added more batter to completely cover the Reese's. This recipe is so unique in that it looks like a scrumptious brownie when they come out of the oven! I don't know if I would change ANYTHING that has to do with this cupcake. The use of unsweetened cocoa powder AND unsweetened baking chocolate squares is such a good choice in this recipe. Definitely a good choice for all of the chocolate lovers out there!

On the top it doesn't look like a normal cupcake that you see every day, but instead it has tiny holes and resembles a brownie. YUM!!!! the smell just fills the air when you uncover them in my cupcake tote (where they are right now).

What I will probably never attempt ever again: I will never try to make PB whipped cream ever again. The consistency was TERRIBLE and it literally looked like traditional hummus after making it. I'm not sure what happened, but I know now that PB does not work in a whipped cream recipe. I only put like 1 1/2 tbsp! There was also something about the taste that wasn't pleasing. Put simply--PB and whipping cream DO NOT go well together :)

Do they have an PB extract!?

I probably should have stuck with the PB butter cream that I was originally going to make. That saying, "stick to your guns," always seems to apply to me. I've made PB butter cream before and next time I make these cupcakes, it's going on top of them!!!

I only made 7 of these cupcakes and I've decided, after both my parents and myself tried one tonight after dinner, I will not ice the rest of them. In fact, I already ditched the whipped cream. I was going to make some PB butter cream tonight but I've decided that the chocolate brownie-ish cupcakes with the mini Reese's inside is good enough on its own! The cake is so tasty and moist and the Reese's makes it 10x better.

Hooray for un-iced cupcakes!!!!!!

Cheers!

Biggest Order So Far!


I had my first semi-large cupcake order yesterday! An old co-worker requested three dozen cupcakes, three different flavors--vanilla on vanilla, chocolate on chocolate, and the good ol' moist red velvet (and yes, the two extras that you see in the picture to the right were gone the morning after making these! Thanks roomies! I don't need the extra pounds).

I decided to use a brand new chocolate cupcake recipe from my new cupcake cook book! I usually find my recipes online and tweak them a tad but I finally resorted to the new book because I wasn't extremely satisfied with the other chocolate cupcake recipe that I've used in the past. Can you believe it, a recipe that says it yields 12-16 medium-sized cupcakes actually yields over 30!!!! Since I was only making  a dozen, I didn't want to reduce the recipe by that much so I chose a new one!

The recipe included unsweetened chocolate cocoa powder PLUS unsweetened baking chocolate squares. Talk about a chocolate-lover's delight! I'm not too too crazy on chocolate, but the batter sure tasted delish! The picture in the cook book matched exactly how the cupcakes turned out. The smell of brownies filled the air as they baked and filled my nostrils when I held the finished product closer to my face. YUM! 

I used the simple vanilla cupcake recipe that I've used in the past for my oreo-filled cupcakes and then the epic, super moist, red velvet recipe, which by the way, I will NEVER change (it's just THAT good).

Ryan wanted the classic pair of chocolate cupcakes and chocolate butter cream, vanilla cupcakes with vanilla butter cream, and cream cheese butter cream atop the red velvet cupcakes. Nothing wrong with the old fashion-liked-by-everyone-on-the-planet matches!

I tried a brand new, made up star technique with the chocolate butter cream using the #22 star tip from Wilton and the finished product was so satisfying that I am sure I will use it again. I used the classic 1M swirl with the vanilla butter cream and then chucked the tip from the pastry bag when I finished off the order with the cream cheese frosting on the red velvet cupcakes. Check out pictures right below!

Thanks Ryan for supporting Liv's Bakery and for all of the other individuals who "like" my page on FB! I'm finally working my way toward opening the bakery with the help of friends and family :)


No Need for Sticks!

Happy Birthday Month to me!!

September brings CAKE POP MONTH! I've only attempted cake pops once before (for a holiday party at our apartment) and they gave me a little bit of trouble back then. I used a favorite red velvet cupcake recipe and my cake pop maker and they turned out great. I decided to use white chocolate chips to cover the pops and then red and gold sprinkles for added holiday decoration. I failed to get a Styrofoam block to stick them up in, so I laid them flat on a plate. This didn't go well as they literally stuck permanently to the plate and were extremely hard to remove for some reason!

In conclusion, they were delicious!

This time around for my sister's Labor Day cookout, I used a very simple vanilla cupcake recipe to make vanilla cake pops and planned on using Wilton's chocolate candy melts to cover the pops. Then of course rainbow sprinkles for fun.

These provided many problems!! First of all, the cupcake recipe I used didn't yield the best results for the cake pops. I have used the recipe before for regular cupcakes and everything was dandy. For some reason, the cake pops in the maker did not rise. They looked more like mushrooms or basically an epic cake pop failure!

Time to improvise! (I've been getting pretty good at this lately!)

I've watched numerous videos of Bakerella making cake pops on YouTube and she doesn't even have a cake pop maker. She uses a different method of baking a boxed cake (of course this term doesn't even exist in my vocabulary), breaking the cake up into little pieces, adding a can of pre-made icing (another yuck!) to the crushed cake, and forming her own balls.

I resorted to this method but instead made my own homemade butter cream (just a tad!) and added this to the crumbled cake pop disaster so that the mixture was pliable and easy to roll into the balls. I froze the mixture for about 30 minutes so that it was easier to roll. This method left me with about 30-35 cake pops!

Then came the other disaster. (These really aren't disasters but instead road blocks that I encourage myself to get through by improvising). The chocolate candy melts didn't melt right at all. It was a thick frosting-like substance which DID NOT make well for dipping.

Mars to the rescue!!!

After already going out once to Mars supermarket to get more powdered sugar for the small amount of butter cream icing that I needed, I went BACK out to get chocolate chips.

I simply melted the chocolate chips, dipped the cake balls, laid them out on parchment paper, and sprinkled with rainbow sprinkles and gold sprinkles that I had laying around my apartment.

I left them on the parchment paper, placed them in the fridge again, and awaited the cook out hour.

P.S.: I didn't use the sticks because there were only 18 of them that came with the cake pop maker and I didn't want to have to worry about people throwing them away by accident (they are plastic and reusable). Therefore, these were CAKE BALLS! and everyone enjoyed them very much :)

After all the trouble I went through and the multiple "disasters" everyone was going back for more!

They were so moist and scrumptious because of the added butter cream (I recommend using the process I used). It was a complete mess dipping/making the cake pops with melted chocolate with my hands but the outcome was extremely desirable.

I highly recommend making cake balls or cake pops for cookouts or occasions where there is a variety of finger foods present in the room. People can easily walk right by, snatch one up, and of course come back for more! I also like the balls better than the pops just because they were easier to arrange many of them nicely on a plate (Styrofoam is really expensive for some reason!)

I'm thinking cake pop skewers are coming next! In the mean time, I am preparing for my next cupcake order (3 dozen) for this Thursday. This means that the next cake pop blog special will not be until the 16th.


Photo: Eating yia yias nose!
See, Shawn wanted more too!!
Happy Baking!

S'more of what!?

 
Wow, this is like the uber ultimate s'more! I definitely wouldn't want "s'more" of that...I doubt I could even manage to eat the whole thing! 

I'm sure EVERYONE has had a s'more once or twice or....multiple times (like me) in their life. It is totally the best campfire snack that is so fun to make in the summer! I've even made these in my microwave before! (No...I'm not weird! Have you ever heated up a marshmallow in the microwave and watched it from the outside!? Sooooo silly looking). 

Anyways, That is just a little too much in the picture above. 

This is more like it!

Buttttt...have you ever had a S'MORE CUPCAKE!? Chances are probably more slim...

I changed up a couple things here and made it my own concoction. I think I am getting better at that the more I bake! *Crosses Fingers* I've seen other s'mores cupcakes and a few were original...a few weren't...and I didn't want to copy ANY idea from anyone this time around. 

I decided to take my chocolate cupcake recipe that I used a while back for my boss' 60th birthday party, stir in some mini marshmallows to the batter, and add my very own special icing. I have decided that I AM NOT going to reveal my special ingredient that is featured in my "graham cracker" butter cream. After all, the main ingredients in a s'more are graham crackers, chocolate, and marshmallows...as long as I captured those 3 flavors, I figured I was good to go! 

I was a little worried about the marshmallows diving into the moist, can't-help-but-lick-the-spatula chocolate cake batter. I went ahead and dumped more than half the bag into the batter and stirred it on up. 
After baking them for about 20 minutes...well not about...for 20 minutes exactly...They were ready to be pulled out! It was a sight to see (I should have captured a picture) looking through the oven door while they were baking because the marshmallows were bubbling away! I was definitely worried that the cupcake itself wasn't going to cook all the way and the marshmallow was going to ruin the cupcakes. This wasn't the case though...After my first batch, I put a few less marshmallows into each liner and they came out perfect!
Then comes my least favorite part of baking cupcakes...having to wait for them to cool completely before icing them! I whipped up the world's most amazing "graham cracker" butter cream. No really...it is amazing...this is just regular vanilla butter cream with that special ingredient that I cannot reveal...unfortunately :) For the FEW of you that know, please keep the secret safe within you!

After adding some left over graham cracker crumbs to the tops, they were completed!

What I will change next time: Put a few less mini marshmallows in each liner...this will prevent any sticking to the liner and cause the batter to rise more over the 'mallows to leave the cupcakes less sticky and chewy on the tops. Many of mine turned out like the picture above after the first batch!

What was a little odd: The marshmallows caused the tops of the cupcakes to be a little chewy. It's very hard to explain, but I am interested to see how they are tomorrow after the icing has been sitting on top of the cupcake over night. Maybe things will change! Not necessarily a bad thing though, but next time I will definitely put less 'mallows.

What I love about these: This is one of my favorite summer time snacks turned into a CUPCAKE! The recipe can EASILY be changed around...I could do vanilla cupcakes...with chocolate chips inside...orrrrrrr....chocolate cupcakes FILLED with marshmallow creme instead of plain 'ol marshmallows...there are numerous ways to change this concoction up! That's exactly what I love about making cupcakes...I also love the fact that I put a secret ingredient into the icing, which REALLY makes it mine without a doubt :)

These cupcakes are for one of my boss' birthdays tomorrow...I hope everyone enjoys! Just an update, my vanilla extract has been sitting for a week now and it is dark...smells absolutely amazing. Can't wait to use it in about 4 weeks!

All by its lonesome!
Crumby S'mores Yummmm!!!
This vase also has purple beads in it...GO RAVENS!!! Beads match the icing :)
Until next time, Cheers!

The Best Homemade Chocolate Cupcakes on the Planet (adapted from kiwisoutback on Squidoo)

  • 3 eggs
  • 3/4 cup butter
  • 2 cups all purpose flour
  • 3/4 cup unsweetened cocoa powder
  • 1 Tablespoon vanilla extract
  • 2 cups sugar
  • 1 1/2 cups milk
  • 1 teaspoon baking soda
  • 3/4 teaspoon baking powder
  • 1/2 teaspoon salt 
  •  
  • Soften the butter at room temperature, while taking the eggs out to also warm to room temperature, approximately 20 minutes. Grease the cupcake pans, and if desired, line them with cupcake wrappers and set aside. Meanwhile, stir together the flour, cocoa powder, baking powder, baking soda, and salt in a mixing bowl, then set aside.
  • Preheat oven to 350° F. Beat the butter in a mixer on medium speed for 30 seconds. Add the eggs, then add the sugar gradually until fully combined. Scrape the sides and beat again until combined. Beat in the vanilla, adding the milk and flour on low speed. Beat on a higher speed for one minute, or until well combined and smooth.
  • Pour the batter into cupcake pan, filling each indention no more than 3/4 full.
  • Bake for 20 minutes, or until a toothpick comes out clean when inserted into the center of a cupcake. Cool for at least 15 minutes, then remove the cupcakes. Frost immediately.


Extract for Life & Raspberry Goo

I was feeling really home-y today and after picking my own fresh berries yesterday, making a more than delicious blackberry cobbler, and still having raspberries to do something with, I decided to make JAM!

While in the barn yesterday at the farm, I noticed something called Pectin. The first thing I thought of when I saw this was bees. Isn't this the stuff they feed on in flowers!? But then i remembered nectar...but I KNOW during my biology class in college, my professor mentioned something about pectin...orrrrr...I could just be having a brain fart.

Anyways, I learned that pectin is stuff that makes the jam all jammy and thick. I didn't bother getting a pouch of this at the barn. When I woke up to make the jam, I thought back to the corn starch that I used for the filling of my cobbler and how nice and thick it got from this. I immediately searched the internet for information about substituting corn starch for pectin and sure enough, this was an option!

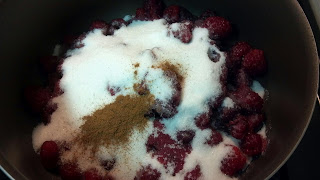
This morning, while staring at my still-vacuumed packed vanilla beans on my counter top, I put raspberries, sugar, cinnamon, and corn starch dissolved in some water into a pot and watched it boil. This is all it takes to make homemade jam and it tastes AMAZING!

What I changed: I didn't want to use as much sugar as most recipes call for (usually a 1 cup of berries to 1 cup of sugar ratio) because it is extremely sweet. I never thought I'd hear myself saying that something was too sweet, but it definitely was. I lowered the sugar--so I ended up with almost 3 cups of raspberries and about 2 cups of sugar. I am obsessed with cinnamon so I added this as well.

I immediately poured the jam into mason jars (turned out to be about 1.5 pints of jam) and shut tight. I just tried it not too long ago and it is perfect. GO ME!!

Try new things, ya never know what you can be good at :)


Now you say...what is this extract talk I've been hearing!? Well, I decided to order a 1/2 pound of Madagascar vanilla beans on Amazon and it was probably the best decision I've made in a while. I need them for the next cupcake order in 2 weeks and heard they can keep for a while as long as you store them correctly. When I was ordering them, I also learned that you only need about 22 to make a quart of vanilla extract. What a perfect idea instead of buying a $5 tiny-ass bottle in the store!! (Pardon my french)

When I saw this though, I thought, "Hmmm...it has to be a difficult process and how in the world do you make extract!?" Here is where Google comes into play once again...

Mid-level vodka and heavenly smelling vanilla beans is ALL you need! WHAT!? Craziness! And a must-have...

Tip of the day: Use 1 oz. or about 8 beans per 1 cup of vodka. I ended up using about 3 cups of vodka so I used 24 beans. This filled an entire wine bottle. EXTRACT FO LIFE!

Click here to get some good tips of how to make your very own extract in just 5 weeks :)

The ingredients...beans and vodka! Oh and an empty, dark colored wine bottle for storing!
Madagascar Vanilla Beans!
Now we wait for at least 5 weeks and VOILA!


CHEERS MY FRIENDS!

Forget Pillsbury!

Dripping...sweat........on the fruit farm....picking raspberries and blackberries!!! That's exactly what I was doing yesterday in Woodbine, MD and what a great experience it was! Pulling up to the farm, I thought about how carefree it is out there. Actually, I'm sure it's A LOT of work but I'd love just getting away for a day and picking berries til I drop. I can't wait to go back to pick some yummy apples next month! Everyone should check out Larriland Farm.

My fingers smell like vanilla right now and I am still picking out the "caviar" from my fingernails...but that's a different story...for the following blog!

Getting back on track, After spending a few hours on the farm yesterday and splitting up the berries, I came home with 2 full quarts of blackberries and a large container of raspberries. While picking, I immediately knew I was going to come home and make a pie. Although, I am not too, too fond of making pies...so when I was lounging around last night searching for recipes and NOT wanting to go out in the rain, I came across a blackberry cobbler recipe. It turned out I had everything in my pantry so it seemed like the perfect treat to make on a gloomy night.

The smell of blackberries and cinnamon quickly filled the air as I made the filling. Corn starch also became my best friend last night (and this afternoon) and at the same time, I realized I was making homemade biscuits.

Berries in the pot! Accompanied by sugar and cinnamon.

 
After adding corn starch and water to the berries, it looked jammy and thick.


The look of this cobbler filling made me want to make homemade jam more and more by the minute. I figured it couldn't be too hard and after getting some tips, I knew that's the next project I'd tackle in the morning. But first, I had to full on tackle this sweet blackberry cobbler.

After pouring the filling into an 8 inch square pan and dotting with butter cubes, I whipped up the biscuit mixture and dropped in chunks by simply using my fingers.


This right here doesn't necessarily look way too appetizing but the smell of the hot, jammy filling took over any other sense that would even be possible at this moment. It was ready to bake!

After waiting patiently for about 35-40 minutes, my blackberry cobbler was ready to be gobbled up. NOM-NOM.

...But not before whipping up some whipped cream from the whipping cream I just so happened to have in my fridge...soon I will be making this with HOMEMADE HARD-EARNED VANILLA EXTRACT!


GET IN MY BELLLAAAAYYY.

 Blackberry Cobbler (adapted from Taste of Home)

 Ingredients

  • 3 cups fresh or frozen blackberries
  • 1 cup sugar
  • 1/4 teaspoon ground cinnamon
  • 3 tablespoons cornstarch
  • 1 cup cold water
  • 1 tablespoon butter
  • BISCUIT TOPPING:
  • 1-1/2 cups all-purpose flour
  • 1 tablespoon sugar
  • 1-1/2 teaspoons baking powder
  • 1/2 teaspoon salt
  • 1/2 cup cold butter, cubed
  • 1/2 cup 2% milk (I used skim)
  • Whipped topping or vanilla ice cream, optional (I suggest making homemade because it's SOOOOO easy :))

Directions

  • In a large saucepan, combine the blackberries, sugar and cinnamon. Cook and stir until mixture comes to a boil. Combine cornstarch and water until smooth; stir into fruit mixture. Bring to a boil; cook and stir for 2 minutes or until thickened. Pour into a greased 8-in. square baking dish. Dot with butter.
  • For topping, in a small bowl, combine the flour, sugar, baking powder and salt. Cut in butter until mixture resembles coarse crumbs. Stir in milk just until moistened. Drop by tablespoonfuls onto hot berry mixture.
  • Bake, uncovered, at 350° for 30-35 minutes or until filling is bubbly and topping is golden brown. Serve warm with whipped topping or ice cream. Yield: 9 servings.

N.E.G.S.


Never Eat the Green Stuff. 
(This is not my pie!) My mom last night said that she’s never even seen green key lime pie—but I have! And apparently, you should never eat it (say the locals in Key West). Yellow is the way to go. I wouldn’t even know how to make it green—food dye? But why ruin the natural color of freshly, hand-squeezed lime juice and thick, creamy, sweetened condensed milk!?
Everyone has been telling me that I need to start writing my own recipes. It’s true, I do need to if I want to open my own bakery; however, I first need to have a strong background of a variety of different desserts and have experience creating these treats first before I can even begin to concoct my own recipes. I need to get a good sense of what works and what doesn’t work in recipes that I choose and then switch it up—ingredients that is—to make them my OWN. I will get there in time :)
Back to the delicious key lime pie I made yesterday.
Homemade crust-check
Homemade filling with freshly squeezed limes-check
Homemade meringue-check
Nothing can get better than this!
Crust is extremely easy to make if you can find already-crushed graham crackers in your local grocery store. I stole the last box of Keebler's yesterday at Walmart! Well not stole, but you know what I mean. I have crushed my own grahams in the past when I made the lemon tart but it just doesn’t get as super-fine as it needs to be for a nice, smooth crust. Once you get the already-crushed grahams, you mix them with butter and sugar and BAM! You have a sweet crust that is baked for about 7 minutes and can be used for various pies and cheesecakes! Substitute chocolate or cinnamon grahams and you have a different flavor to switch up to now and then depending on what kind of dessert you’re making.
Next came the pie filling. Super easy—3 egg yolks, a can of sweetened condensed milk, lime zest, freshly squeezed lime juice from about 5 limes, and some heavy cream. The hardest part was squeezing the limes. It took about 4.5-5 limes to get just a tad over ½ cup (I like it a little sourer) and my hand sure did hurt after this! To zest the lime, I used a hand, cheese grater (click there if you don't know what I am talking about). You simply pour the mixture over the crust and bake for 30 minutes or until stiff. 
  

While the pie is baking, I whipped up the meringue so that it was ready to be spooned on top of the hot pie filling. I was a little worried about the meringue because it was my first time making it and I didn’t want it to spread out or flatten in any way—I didn’t know what to expect.
The meringue is a piece of cake--4 egg whites (3 were left over from the pie filling and I used 1 ounce of egg white from the carton that was leftover from my angel food cake), white sugar, corn starch, and a pinch of salt. Everything is whipped up until the egg whites form soft peaks and then spooned over top of the hot pie filling. Since I don’t have a torch, I put the whole sucker back in the oven for about 10 minutes.
Beginning of the dollop-ing!
What I will use next time: Actual Key Limes! I didn’t particularly look for these while I was in Walmart and instead, just spotted regular limes and went with those. Apparently key limes are little smaller and more sour. Perfect for key lime pie!
Other than that, everything turned out FANTASTIC! The pie had just the right amount of tartness, the meringue was the perfect consistency and didn’t flatten in any way, and the crust wasn’t too thick or thin. The recipe that I used suggested that you serve the pie warm or at room temp; however, this did not work for me. I’ve always had key lime pie cold first off, and second off, the pie fell apart when I tried to cut it when it was warm. Later on, I cut it after it had been refrigerated and it was perfect. 
YUMMO! (As my mother would say)
Finished! golden tips and yellow pie!
 
 I have Key Lime Pie left over so sad face, go away!


Take your own jab at the recipe here. You won't fail it...it won't fail you...either way you wanna look at it...hmmm...think about it. 

Cheers!!