Milky Goodness

Have you tried Tres Leches Cake before!? If not, I highly recommend trying out this recipe and checking out this girl's blog. She captures every step in a professional looking picture and really explains the cake process well.

Anyways, I used this recipe yesterday to make the cake. For anyone that doesn't know, "Tres Leches" means "Three Milk" and when you try it, you will know what I mean by the title of this post! For anyone that can't stand or can't have milk, I would probably suggest staying away from this type of cake. You actually use four milks in this recipe (should we change the name to Quatro Leches??), but the one doesn't really count I guess. You use a 1/3 cup whole milk (I actually substituted skim milk since it was such a little amount and since that's all I had) in the cake batter. That is the only tiny change I made to the recipe. This recipe seems like it would be hard to tweak since the three milks are pretty specific and the cake is a sponge cake that can't simply be changed.

You use a can of condensed milk, a can of evaporated milk, and a 1/4 cup of whipping cream for the milky goodness part of the cake. This actually is what makes the cake (obviously) and cannot be tweaked in my opinion. When you get to this part in the recipe, you will want to kill yourself for choosing a dessert like this one. Just kidding, not LITERALLY kill yourself, but the milky goodness part of the recipe can be pretty fattening in many people's eyes. It is definitely the best part though. After baking the sponge cake, you let it cool and then poke fork holes all around the surface of the cake. Make sure you make enough holes so that when you pour the milky goodness over the cake, it soaks in everywhere. You basically just combine the three milks into a pitcher (this looks pretty gross at first, but once it's all mixed up, it is a bit more appealing) and pour the pitcher (minus 1 cup of the mixture) alllllllll over the cake. Now, you gotta leave it sit for about 30 minutes to allow maximum soaking. It seems like you are pouring a lot of milk over the cake, but since it's a sponge cake, it really holds tight to the amount of liquid you pour in.

Once you feel that it is all soaked up, you make the homemade whipped cream for the icing! I didn't realize at first that I was literally making whipped cream but the only two ingredients that are used for the icing are a pint of whipping cream and 3-4 tablespoons of sugar (the recipe says 3 but if you want it sweeter, throw in some more to your liking). You whip it up good with a whisk attached to a handheld blender until it literally becomes whipped cream. Next, you simply spread it over the cake!

The recipe suggested topping with maraschino cherries either chopped or whole, but I left this out partly because I forgot to grab them at the store and....well that is really the only reason. I'd suggest using strawberries as well since the cake is pretty light.

For anyone that doesn't like cake all that much, I'd suggest this recipe. It's not too sweet since there is less sugar and lots of milk plus the whipped cream topping. My roommate suggested this recipe as a part of International Month because of the said reason (she doesn't really like cake) and also because she said it is the best cake she's ever had!

Suggestion: If you want to make it low fat, I'd suggest using the skim milk (like I did) as well as an artificial sweetener in place of sugar. If they sell low-fat whipping cream, that could work too for the topping! Although, I'm starting to think this cake is only as delicious as it is when using the fattier milks, unfortunately.

This cake is a Spanish, milky, party in your mouth if you enjoy milk and spongy consistencies. I recommend this recipe to anyone and everyone!

Stay tuned for Strawberry Tartlets on Wednesday! That will conclude my International Month. Here we come July and less than 200 calorie desserts!!

Cheers!


Folding the whipped egg whites into the flower/egg yolk mixture!

Finished Tres Leches Cake! It's hard to tell the moistness of it, but it's definitely there! 

Bangin' Biscotti

Just so you are all aware, those cinnamon sugar biscotti turned out FANTASTIC! Almost the whole plate is gone already! I decided to head over to my parents yesterday on Father's Day to bake because there is A LOT more counter space there. I really need to find me a place where counter space is unlimited. Spreading out definitely makes a difference and places less stress on ya. Apartment complexes really need to work on placing outlets in the correct places...just sayin'...

What I did not expect: I thought the biscotti were going to be much larger. Ya know, the kind you see at Starbucks that are like $2...I thought those were the normal size. Mine turned out to be mini, maybe about 2 inches long, but it actually ended up being the perfect size. They are perfect for dipping fully into a cup of coffee for breakfast or even for a late night snack. Cinnamon sugar probably has to be my favorite flavor for anything. My favorite cookie happens to be Snickerdoodles which captures this flavor well. Also can't forget the cinnamon sugar pretzels from Auntie Anne's in the mall. Anyways, the fact that I didn't expect these to be so small ended up being a good thing after all!

Biscotti are extremely easy to make too! It's pretty much like making a hard cookie just cut into a different shape. Basically, you make the dough up and add whatever toppings you want into it. I chose to add slivered almonds (which actually didn't give it much more flavor since the cinnamon seems to over power everything). I also saw a picture on Instagram after I had hashtagged #biscotti of a biscotti that had mango, dates, and other fruit cake type additions. You really could add anything you want into this cookie. I also had planned on dipping them halfway into milk chocolate and topping with more slivered almonds. However, since they turned out smaller, I didn't do this.

Next time: When you prepare the dough for baking, you form it into two 9-inch long logs about 1.5 inches wide. You bake for about 25 minutes until firm and golden, let cool for 15 minutes, cut each log into 1/2 inch slices diagonally, and place back into the oven for 15-20 minutes. Next time, I plan to make the logs wider so that the slices are longer (just like the biscotti we see in Starbucks and other places). These will allow for dipping and adding more toppings!

All in all, I am so pleased with the outcome of my very first biscotti. As a newbie, I couldn't be more happier with the results! They are so easy to make, I am ready to prepare many more concoctions in the future for all new biscotti flavors.Stay tuned for more to come!

In the meantime, don't forget, I am ready for orders on your favorite cupcake flavors, cake pop creations, and possibly a few cakes. If you know of an upcoming party you're attending, throwing, or perhaps something you're not attending but know of, don't hesitate to recommend Liv's Bakery!

Cheers!

P.S: Business cards coming soon!!


Cupcake Galore

Can't believe June is already half way over! I've had my blog for a month and a half now give or take some and there is still MUCH more to come. I am trying my best to stick to my calendar but sometimes it's just so hard considering my very busy life. Not...sometimes I just like to take it easy on my Sundays! Not to say baking doesn't help me relax, but on hot summer days it's hard to be in a scorching kitchen that is very limited to baking space. I can't wait to someday have my own bakery where there is all the space in the universe! But for now, my tiny counter top will have to do. I can't wait to get my orders underway. First cake pop order in August! Thanks to Racquel's mother who has faith in my baking skills :)

Even though I skipped out on baking the biscotti last Sunday (I am making it tomorrow instead), I think that my cupcakes made up for the absence. I threw a surprise 60th birthday party for my boss at the Crowne Plaza Baltimore last night and it turned out to be a blast! Good crowd, good friends, good bartender, and good times were had! I knew I'd be baking something for the party, so I figured that dipping out on the biscotti last weekend was not going to be a huge deal. I decided to make:

*Chocolate cupcakes with chocolate chips inside and a vanilla butter cream icing
*Simple vanilla cupcakes with Nutella butter cream frosting

Both were fantastic! The only thing I don't recommend counting on: the yield amount on the recipe. Every time I've baked cupcakes, the recipe always seems to make more! This isn't a bad thing at all though. The chocolate cupcake recipe I used this time said it would make 12-16 "medium sized" cupcakes. Now, what do you think a "medium sized" cupcake is? I was thinking a normal sized cupcake pan would yield these results. Nope! I ended up making about 34 of these suckers! And I still had the vanilla cupcakes to make!! In this case, I'm thinking the author's "medium sized" cupcake was actually a giant sized.

What not to do: I've used cupcake liners whenever baking cupcakes. I thought I was going to run out this time since my once thought normal sized cupcake pans ended up spitting out many more, so I decided to do one load without liners and sprayed the "non-stick" cupcake pan with Pam. All I have to say is thank goodness this recipe yielded many more than I expected! ;)

Another thing that worried me: My good old friend Jason tried one of the chocolate cupcakes after I frosted them and the chocolate chips seemed to sink to the bottom (which is somewhat expected) and a few got pulled off onto the cupcake liner. I was a tad disappointed but I thought to myself, whatever, as long as they taste delish! (Which turned out to be so). It turned out that once cooled completely and eaten last night (the day after making them) this didn't happen too much! *relief*

I was extremely proud of both of the icing consistencies! The trick to making butter cream is adding the perfect amount of powdered sugar. Both frostings were creamy and had that whipped sensation. They piped out of the pastry bag awesomely! (Yes, that is actually a word)

I highly recommend Nutella butter cream to anyone and everyone! It captures that chocolatey hazelnut flavor yet in the form of a creamy, homemade frosting. *Pats myself on the back*

I had lots of left over Nutella frosting so I added a little decoration on the vanilla butter cream frosted cupcakes. I love the satisfaction of others enjoying my creations! I'm ready when you are :)

Cheers!!


Where Are the Biscotti!?

Hey all! If anyone is wondering, I didn't make the Cinnamon Sugar Biscotti (BTW, Biscotto is the singular version if ya'll didn't know) yesterday simply because I wanted a lazy Sunday after laying out by the pool for 3 hours. I know, it's a lame excuse, but looking and feeling like a lobster after 100 degree weather can definitely wear a girl out! I had this plan, to twist around a basic cinnamon & sugar Italian biscotti recipe by adding slivered almonds (a lot of em!) and then dipping them halfway into melted milk chocolate chips and covering with slivered almonds again. Sounds tasty eh!? It was such a simple recipe too and I STILL didn't have the strength to bake yesterday. Instead I went to Noodles & Co. with good friends to enjoy a nice vegetarian meal (If anyone ever goes there and likes trying new things, try the new veggie flat bread, it is absolutely delish!).

Anyways, I still plan on trying out this concoction in the near future; however, for now, I need to focus on my cupcakes that I am making for my boss' surprise, 60th birthday party on Friday! I am even switching up my gym days in order to focus on these cupcakes Thursday night. I decided on a vanilla cupcake with Nutella butter cream frosting as well as a double chocolate cupcake with vanilla butter cream icing! Adding chocolate chips into the chocolate cupcake is going to satisfy all those who are chocolate fanatics that are attending. I spent a good amount of time today searching for the perfect cake recipes for this event because I feel like chocolate and vanilla cupcakes can be SO boring unless you spice 'em up a little. One day, I am going to make the The Ultimate Vanilla Cupcake by Stef on The Cupcake Project. This recipe looks spectacular using whole milk and a whole vanilla bean. Apparently these are expensive, so I will save this project for the future :D Check it out though! I plan on following this woman's recipes to become better at what I want to do with my life--become an ultimate baker! Okay...maybe I'm taking it a bit too far, but I know it will help me become a better baker and push me closer and closer to my goal--opening the ultimate bakery! Okay, just kidding again.

I just want to be a successful baker...NOW TAKING ORDERS!! Contact me on here or on Facebook and tell me whatcha want.

Can't wait to hear from ya'll!

Dessert from my Background

First time making Baklava EVER and it turned out really well! I'm so excited to see what else this international month brings with the desserts that I've chosen. I used to be nervous about baking new things but so far...I haven't been let down and it feels great!

This recipe was super easy and made the smallest mess out of any other dessert that I've baked. I've never worked with phyllo dough before, but from watching my mom make so much spanikopita in my days, I knew it was going to be some sort of challenge. The most important thing to remember is DON'T LET THE PHYLLO DRY OUT!! whatever you do...just don't or you will be wasting lots of good dough. It was already challenging when I pulled the dough out of the package because it was kind of broken up into thinner, shorter pieces. But keeping the dough under a damp towel really makes life easier when working with this thinner-than-paper ingredient.

The original recipe made 18 servings, but I cut it in half, made 9, and it fit perfectly in my square cake pan. The dough that I once thought was messed up, ended up fitting very nicely into the pan without cutting it. Layer by layer I went...butter by butter...I'm not sure that made sense but literally...layer, butter, layer, butter, layer, butter...oh there's some pecans/cinnamon/clove mixture...layer, butter, layer, butter...on and on and on until voillaaaa it was ready to go in the oven!

At this point, while it was in the oven for 50 minutes, I decided to dye my hair! Not reading the recipe thoroughly, I wasn't aware that I was supposed to make the sauce WHILE the pastries were baking. Next thing I knew, there was only 5 minutes left on the timer and I still hadn't begun making the glaze! I threw together the sugar, water, honey, and vanilla...threw it on the stove...(well, I was following the directions still!) and let it simmer for 20 minutes. It said that I needed to pour the sauce over the pastries right away, but I simply placed a towel over the pan, waited for the sauce to simmer and it turned out JUST fine!

Keep in mind, this recipe didn't call for cloves, but I threw some in the cinnamon and pecan mix and it made it so tasty. I also used pecans instead of walnuts in this recipe. I realize now that I should have let the sauce seep into the pastries a little longer before trying a piece, but I couldn't resist! At this moment, they are covered with saran wrap so that they can get a little gooey-er (yes, that's a word in my book). I can't wait to try another piece tomorrow!!!

Another smile on my face from a job well done. Come back for some cinnamon sugar biscotti with Alivia's special twist next Sunday! 


2 in 1 day!

Yep...that's right, I made two kinds of cupcakes in one day and one of 'em was apparently the best yet. Today, I made peanut butter cupcakes (with a hint of cinnamon that is surprisingly a great touch!) with peanut butter creme icing and a piece of Hershey's chocolate to top it off. I was already making a small batch of Red Velvet cupcakes with cream cheese icing for a co-worker and after watching multiple videos of people making cupcakes this afternoon, I decided to make a batch of the others too!

Today was officially my first "order" and an all time favorite cupcake--Red Velvet. How can you go wrong with them!? This was the very first kind of cupcake I made for my office and they were a hit. My co-worker offered to pay me for a half dozen of them but my response was "I'm not quite there yet!" I haven't yet figured out the prices for my cupcakes, but I plan to seal the deal sometime soon. I thought that once I got my blog underway and my viewers could see and read about my talent, I could begin selling my desserts to get Liv's Bakery kickin'!

The peanut butter cake recipe was absolutely impeccable with a hint of cinnamon. I never thought that cinnamon and peanut butter would pair so nicely, but hey! Ya learn something new through every concoction. My cake was moist, flavorful, and the size was perfect. I never thought such a small amount of peanut butter would go such a long way! I thought that the peanut butter creme icing was going to be too much PB flavor, but this definitely wasn't the case. The icing was the perfect consistency to spread on with a spatula and the chocolate piece was just right for the mix EVERYONE dies for.

For the Red Velvet cupcakes, I think I will always use the same recipe because it turns out great each time. I knew they had to look good as they were a gift, and I ended up placing just the right amount of batter into the liners as they rose right past the top of the rim. Since I cut the recipe down by so much, I had to play with the ingredients in the icing to make the right amount. Cream cheese, sour cream, confectioners sugar, butter, and vanilla. I figured out when I was younger that home made icing will always be good no matter the amount of ingredients added. Just kidding, I can't take it THAT far. But to make it thicker, add more sugar...to make it thinner, add a bit of milk! There was just that little bit left over in the bowl to enjoy :)

Happy Memorial Day and thank you to all of our soldiers that fight for our country. Peace!


Panic Attack Central! Well...not so much...

Welcome back again :)

I couldn't stop thinking about candy bar inspired cupcakes and my mind was racing with all sorts of ideas. I decided that I am going to have a theme of just this in a few months--candy bar inspired cupcakes! As my mind was racing with ideas for different filled cupcakes, I actually just decided to make chocolate cupcakes with a cream cheese filling and a raspberry cool whip frosting! At the end, you will get to see the finished product that turned out extremely well for having made a boo boo...

I followed a simple chocolate cake recipe that I found somewhat odd at first because of the 1 cup oil, 1 cup water, and 1 cup milk dealio. The mixture turned out pretty thin compared to other cupcakes that I've made, but this didn't keep them from being moist and delicious. I think what I liked the most was that the cupcake wasn't too TOO chocolatey. It was just right.

Then, I followed an easy creme filling recipe except I added a twist and threw in some low fat cream cheese! Once I baked the 32 cupcakes and they cooled for a bit, I used my pastry bag and piper tool to punch a hole in the cupcake and filled it on up. Some of the cupcakes turned out tiny so next time I will fill up the liner with more batter instead of just half way like the recipe suggested.

After filling every cupcake, I waited a good amount of time to let them cool completely before piping on the frosting. This is where I made the boo boo...in my mind I had this vivid image of a reddish colored light and airy raspberry cool whip frosting. This wasn't the case with the finished product. I followed an extremely easy cool whip/pudding frosting recipe and added a container of raspberries to the mixture. Now, I'm not too sure if I used too much milk since I doubled the recipe or all of the water from the fresh fruit made the concoction so thin and runny. But something DEFINITELY went wrong with my not-so-pretty frosting. The color was almost on point and the bits of raspberries after blending really made the frosting look legit and yummy. And it was! Just not so great for piping out of the pastry bag and onto a cupcake...

This is where I was happy that I had extra filling left over! I used the cream cheese filling and added more powdered sugar and a bit of the messed up frosting to still capture that raspberry flavor and look. Although I didn't have enough to icing every single cupcake, it saved the lives of them and STILL were a super hit at work the next 2 days.

Like I mention in my "About Me" section on the homepage of my blog...the greatest feeling comes from the reactions of people biting into a delicious, home made dessert. I felt very content when the cupcakes were gone by lunch time AND THEN by 11am the following day. This just goes to show that if ya screw somethin' up, improvise and the outcome will be even more satisfying :D

This was supposed to be a blog about what not to do when baking, but now I feel that this is the perfect example of what a good baker does when his or her initial reaction is literally freaking out (yes, I freaked out a little bit too much when the icing did not turn out the way I pictured). Just use your natural instincts and knowledge of scratch baking and the finished product will still have people coming back for more!


(Really) Easy Tartufo

You're probably saying to yourself, "what in the WORLD is a Tartufo!?" A little background of a Tartufo: an Italian ice cream dessert that involves NO baking whatsoever. The word 'tartufo' actually means truffle in Italian! It's sort of an odd type of truffle if ya ask me, but that is what makes this a unique, simple dessert. The size is amazing and satisfies your sweet tooth in just a few bites (careful, don't bite TOO soon! As you will see what the finished product looks like at the end of my blog).

I highly recommend this dessert to anyone (like my one roommate *aheemmmm* Diana) that isn't such an expert at baking :D There is no oven involved! Actually...now that I think about it, my roommate just isn't very good at following a recipe (don't worry, this is why you're a good COOK!) She's more of an "I'm going to add whatever whenever I like while I cook" girl which is okay when cooking. Baking is a little more precise though...but I had fun playing around with this recipe as the ingredients really can be used in any amount based on your taste buds.

The main ingredients in Tartufo are icecream, frozen fruit, milk chocolate, cookie crumbles, and melted chocolate (yes only 5 ingredients!!!) When I looked up a basic Tartufo recipe, the author had used chocolate ice cream, frozen chopped cherries, milk chocolate bits, chocolate cookie crumbles, and dark/milk chocolate coating. However, I decided to mix it up a little bit since I (in contrast to the rest of my family) am not a chocolate freak! (Sorry Mom, Dad, and Alex).

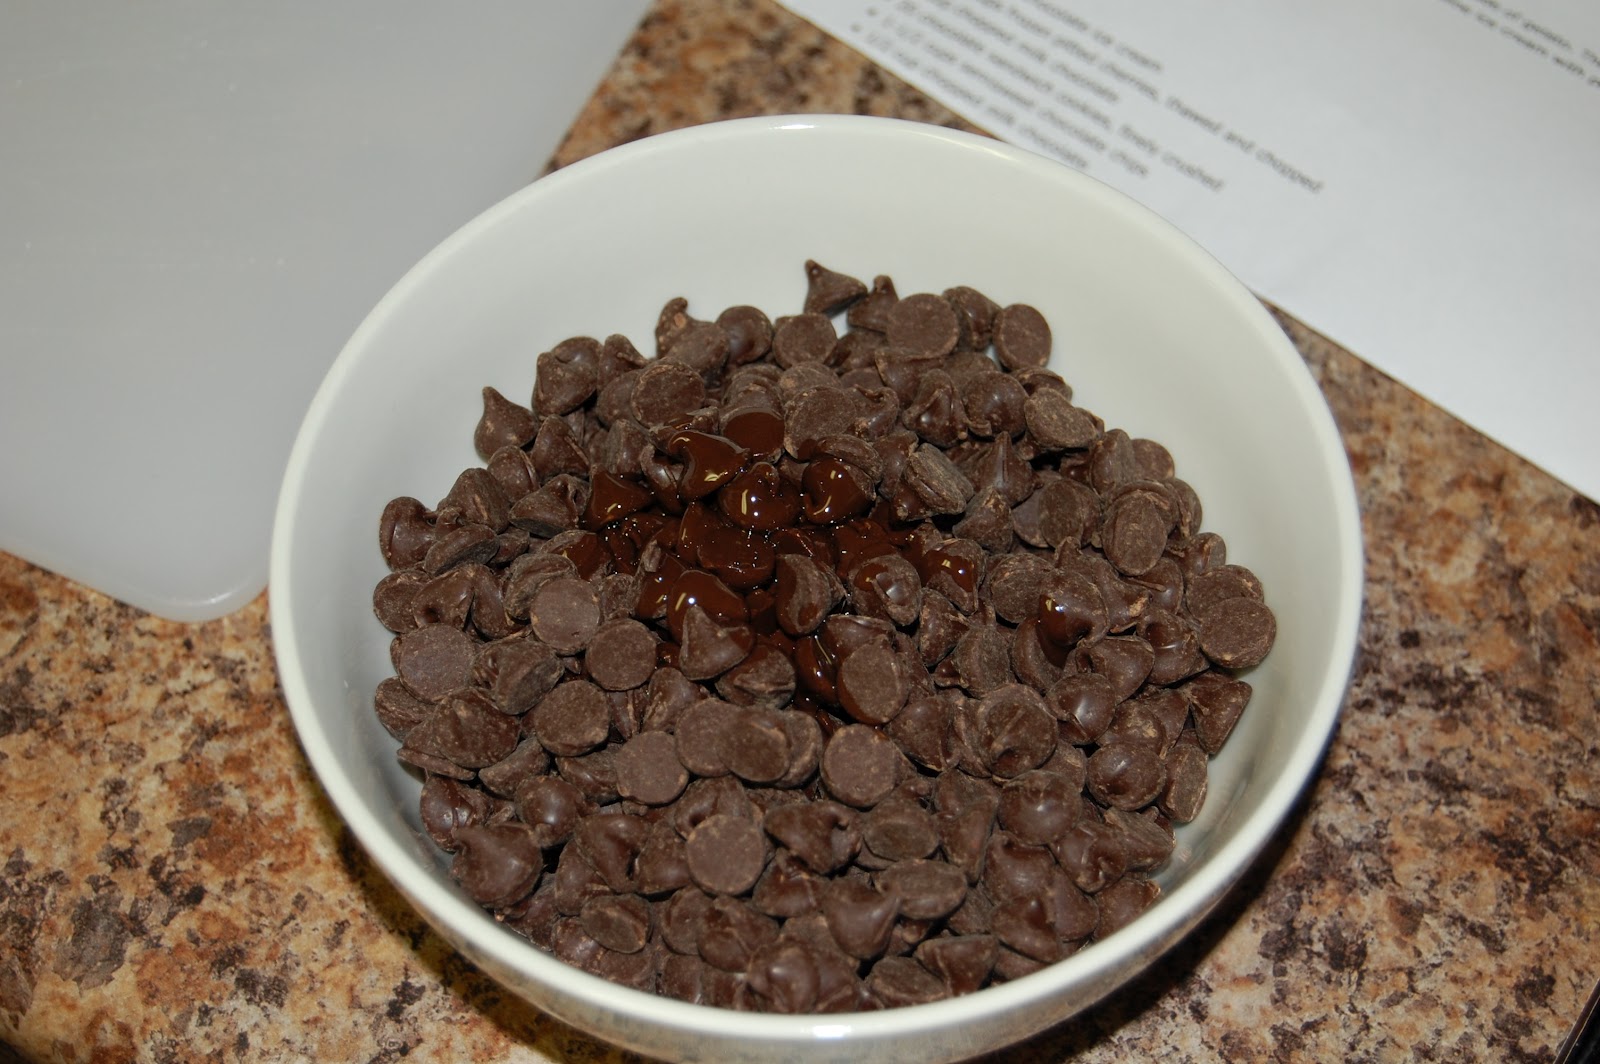
My ingredients were strawberry ice cream, frozen raspberries, Hershey's milk chocolate bars chopped up into tiny bits, chocolate (store brand!) graham crackers crushed with the help of my awesome roommates forehead/muscles, semi-sweet melted chocolate chips with the help of more Hershey's chocolate for the hard coating. 

First, you let the ice cream (flavor of your choice, but don't forget to pair it with the just-right frozen fruit) sit out for about 5 minutes to get just a little soft where it's the perfect consistency to scoop out easily. The recipe said 3.5 cups but I did just a bit more--and in my opinion, you could pair the amount of ice cream with the chocolate and fruit however you like it. If you like more ice cream than fruit and chocolate, go right ahead!! No one's stoppin' ya. In my eyes, there is no limit.

When the ice cream is just soft enough, you chop about 1 cup of milk chocolate (I used Hershey's) into fine pieces which you are soon going to mix into the ice cream. My nice roommate decided to be the guest baker and those are his manly arms (no....they are not mine!).


Go ahead and dump that chocolate into the ice cream and begin chopping up your FROZEN fruit of choice! In my case, it was delicious raspberries simply because I think raspberry, strawberry, and chocolate are such a tasty combo! And yup, there is my pale arm...As you can see from the picture, I used store brand frozen fruit as well. That's right, I am a cheap-o.


Then ya add the fruit to the ice cream and milk chocolate mixture and stir it like there's no tomorrow. Actually...don't...then your ice cream will get all milky, gooey, and you won't be able to scoop it into balls silly!


Once you feel like the chocolate and fruit are evenly distributed into the ice cream, set the bowl aside (or in the freezer like I did because I knew the chocolate grahams were going to take a while to crush up finely). Here's where the fun part comes into play. Instead of buying already-crushed-made-for-lazy-folks, I decided to switch it up and buy chocolate graham crackers (yes, store brand...again--hey they taste EXACTLY the same people!) and crush 'em myself! Again...with the fine help of my roommate (the one that likes to help...not the other one...love you Diana!!!!!). This is where the strong foreheads come into play, if you have one handy, I'd suggest using it. Just kidding...you might get a headache...he really didn't use this method for too long!


So, once the migraine hit him, I began using a cup (or you could use whatever is handy to crush the remaining grahams). I used one pack of crackers to roll the scooped ice cream/chocolate/raspberry balls into.


This was the almost finished cracker product!


Then I took the ice cream mixture out of the freezer, used a spoon (I couldn't find my ice cream scooper...which we might not even own...so a spoon worked just fine!) to form and roll the ice cream balls in the crackers.


As you can see in the previous picture, the balls were the perfect size to satisfy your sweet tooth! Once you use up all the ice cream mixture, place the Tartufos into the freezer for 2-3 hours until nice and firm. In the microwave, melt semi-sweet chocolate chips with 1 tbsp of oil. Mix in desired amount of milk chocolate to add that extra sweetness. I had to wait a good 20-25 minutes for the chocolate to get to lukewarm so that I could spoon it over the frozen balls.


Drizzle or spoon the chocolate mixture over the frozen ice cream balls and place in the freezer another 2 hours or over night. And there ya have it!!! Easy Tartufo that involves no baking whatsoever!


Oh and don't forget to wait a few moments before biting into one of these...you may get a brain freeze or break a tooth...either way, it won't be fun. So wait 2 minutes, sit back, and enjoy this chocolatey, fruity, bite size (or 2 bites) Italian dessert!

Pair any ice cream with any frozen fruit and chocolate and you will definitely want to make this dessert over and over. Next time, I plan to add nuts or even marshmallows to this delish recipe!

Until next Sunday...see ya!!! Meet me back here to drool over 3 ingredient peanut butter fudge :)

Baked Custard....First Baking Blog YAY!

Shabammmmmm. First baking blog starts now! I'm new at this whole blogging thing! I know when you blog you're supposed to write down whatever comes to your mind. It's kind of difficult for me to do that when I sit at my computer all day at work and send emails to those that expect, of course, good grammar and sophisticated paragraphs. I sort of have the same mind set when it comes to blogging. As everyone knows, yesterday was SUNDAY which meant it was the first day for me to begin my baking themes and the first day to share my life as a baker. I decided to make my first theme of my career Five Ingredients or Less--which obviously means that the 4 desserts that I make this month are going to contain 5 ingredients or less (duhhhh). This may seem simple (which I thought yesterday too when I began making baked custard) but the outcomes are so delicious that the amount of ingredients doesn't even matter anymore.

This literally was the EASIEST dessert that I've ever made in my whole entire life. This of course is set aside from the duties I had as a little girl helping my mother make Yalikmek (however, one might see those duties as stressful and difficult). In fact, my sister and I had the hardest job of the whole Yalikmek making process according to my mom. This was due in large part to the fact that my mom didn't feel like kneading the bread until her arms fell off! She then handed this part off to my sister and I which we deemed as the best time of our lives. Anyways...making baked custard was so simple yet the outcome was pretty desirable.

You literally only use FIVE ingredients--WHOLE milk, a tad bit of sugar, 1/8 tsp of salt (WHAT IS EVEN THE POINT!?), vanilla, and 3 eggs. If you use skim milk, you will not get the same creamy results! But honestly, what is the point of 1/8 tsp of salt anyways!?!


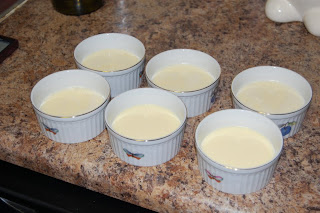
Now once I got all my ingredients settled onto the counter top of my extremely small, cramped kitchen, I began whisking everything together and BAM my custard was ready to be baked. Once poured into each individual cup, you place all 6 cups into a 13x9 inch glass pan and add 1inch of water around the cups. This prevents the custard from burning. I'd like to thank my mother for letting me borrow her beautiful custard cups for this dessert as it is something I wouldn't normally bake.


The baking part of this process takes the longest--45 to 50 minutes--and I actually found that it took about 60 minutes to come to the perfect consistency.


This recipe made 6 impeccable vanilla custard cups (next time I plan on adding a swirl of chocolate into each cup!!!!!).


Now, the recipe originally says you can eat it warm OR cold. I prefer it cold though! Once they were ready to eat, I dug in! The consistency was perfect--creamy and light. My friend (who I owe a HUGE thanks to for taking these pictures...and who will be taking ALL of my pictures to come) added cinnamon to his serving. Yes, yes, I know this isn't RICE pudding (it's okay Martin...) but he said it added an extra touch to the custard! I may have to try that on my next serving...

Welp, that is all for my first baking blog! It's time for the gym...gotta get in beach shape before next Friday!!! OCMD here we come!

PS: I will make sure to look better for the camera next week :)

Thanks S.M.S!

I am so excited to be baking for my roommate's company's happy hour in Rockville, MD on the 25th! Thanks to Select Mortgage Solutions for allowing me to showcase my baked goods during this event and get Liv's Bakery finally underway. Pictures and more blogging to come after this event!

When can I start already!?

I can't wait to share my thoughts and experiences when I get started!! I am so pumped to explore desserts that I've never even thought of making in a million years. Who's ever heard of a TARTUFO!? Not me...but I'm making it in a few weeks! I'm pretty sure June-International month is going to be my favorite month of them all. Baklava, Tiramisu, Tres Leches cake, and Strawberry Wonton Tartlets!! Tonight when I was searching for interesting Asian dessert recipes, I found one that sounds easy as pie but so delicious looking at the same time. This is what really triggered my excitement for my blogging. I can't wait to bake, take pictures, video clips, critique the recipes, share what went wrong (we all know from watching Cupcake Wars that many things can go wrong!) and what I would do differently next time! I hope that everyone checks out my blog EVERY Sunday beginning on MAY 6TH--that is two weeks from now.

Once I get up and running with this, I hope that you will stop by the Requests page to share a favorite dessert that you want me to make. Hopefully sooner or later, I can create an Orders page where you can submit an order for an upcoming event/party/celebration that you are having.

By the way, anyone know of a cool place down at Ocean City either on the boardwalk or...anywhere...that has weird/odd/different/less common desserts!? While I am there, I am going to explore a dessert that I've never tasted before to critique and take pictures of :) This is all for now...DO NOT FORGET TO COME BACK ON HERE ON MAY 6TH! Here I come baking world!

Back in the day...

When it all started! Momma's lil helper :)
When I was only 3 years old, I was using the electric mixer to help my mom make delicious, homemade cookies. When did they start making Betty Crocker and the other dessert-in-bags? To my knowledge...never. Why take all of the fun and excitement out of baking?


Rolling out the Valentine's Day cookies!
 These thin, sugar cookies were on our baking list every year on Valentine's day. Not a year went by when we would forget this tradition (of course until I was a little older). I used to press those little cinnamon heart-shaped candies into the center (and always want to put more!). Were these even hearts anyways???!?! Does anyone else know what I'm talking about?
 

Kneading the Yalikmek (Turkish bread) until we were sore

Yalikmek (not so sure of the exact spelling), Turkish sweet bread, was a tradition that came at the start of a new year. The only part that my sister and I really helped out with was the kneading of the dough. I quote my mom last night when I found this picture, "I used to yell, punch it! Slap it! Go, Go, Go!" This explains the expression on my face in this picture. It also explains why all of our relatives couldn't wait to get their baggie of bread after New Years!
This is how the Yalikmek turned out...a little cinnamon and clove flavor in this spiral shaped bread!


My most recent delish desserts

Red Velvet Cake Pops


Homemade Eclairs with Almonds


Chocolate Kissed Gingerbread Cookies


Pumpkin Cheesecake


Red Velvet Cupcakes with Cream Cheese Icing


Ooey Gooey Pecan Sticky Buns

Welcome!

Hey everyone!

This is my very first post on my brand new baking blog. I am excited about this blog because I'm hoping it will serve as the stepping stones to opening my very own bakery in the years to come. I find myself happiest when in the kitchen (even though my current kitchen is the smallest I've ever been in) and I want to be able to share my homemade creations and happiness with you all!

Stay tuned for a calendar that will show the different themes that I have planned for each month. I hope to also post video clips and an abundance of photos to share on here. Look for tips, delicious dinner & dessert combos, comments from those who try my desserts, what-not-to-dos, and of course my favorite and most tasty recipes for you to try on your own!

Be sure to visit my blog every Sunday!! See you on Sunday, May 5th to kick off my first theme--simple desserts with 5 or less ingredients :)