2 in 1 day!

Yep...that's right, I made two kinds of cupcakes in one day and one of 'em was apparently the best yet. Today, I made peanut butter cupcakes (with a hint of cinnamon that is surprisingly a great touch!) with peanut butter creme icing and a piece of Hershey's chocolate to top it off. I was already making a small batch of Red Velvet cupcakes with cream cheese icing for a co-worker and after watching multiple videos of people making cupcakes this afternoon, I decided to make a batch of the others too!

Today was officially my first "order" and an all time favorite cupcake--Red Velvet. How can you go wrong with them!? This was the very first kind of cupcake I made for my office and they were a hit. My co-worker offered to pay me for a half dozen of them but my response was "I'm not quite there yet!" I haven't yet figured out the prices for my cupcakes, but I plan to seal the deal sometime soon. I thought that once I got my blog underway and my viewers could see and read about my talent, I could begin selling my desserts to get Liv's Bakery kickin'!

The peanut butter cake recipe was absolutely impeccable with a hint of cinnamon. I never thought that cinnamon and peanut butter would pair so nicely, but hey! Ya learn something new through every concoction. My cake was moist, flavorful, and the size was perfect. I never thought such a small amount of peanut butter would go such a long way! I thought that the peanut butter creme icing was going to be too much PB flavor, but this definitely wasn't the case. The icing was the perfect consistency to spread on with a spatula and the chocolate piece was just right for the mix EVERYONE dies for.

For the Red Velvet cupcakes, I think I will always use the same recipe because it turns out great each time. I knew they had to look good as they were a gift, and I ended up placing just the right amount of batter into the liners as they rose right past the top of the rim. Since I cut the recipe down by so much, I had to play with the ingredients in the icing to make the right amount. Cream cheese, sour cream, confectioners sugar, butter, and vanilla. I figured out when I was younger that home made icing will always be good no matter the amount of ingredients added. Just kidding, I can't take it THAT far. But to make it thicker, add more sugar...to make it thinner, add a bit of milk! There was just that little bit left over in the bowl to enjoy :)

Happy Memorial Day and thank you to all of our soldiers that fight for our country. Peace!


Panic Attack Central! Well...not so much...

Welcome back again :)

I couldn't stop thinking about candy bar inspired cupcakes and my mind was racing with all sorts of ideas. I decided that I am going to have a theme of just this in a few months--candy bar inspired cupcakes! As my mind was racing with ideas for different filled cupcakes, I actually just decided to make chocolate cupcakes with a cream cheese filling and a raspberry cool whip frosting! At the end, you will get to see the finished product that turned out extremely well for having made a boo boo...

I followed a simple chocolate cake recipe that I found somewhat odd at first because of the 1 cup oil, 1 cup water, and 1 cup milk dealio. The mixture turned out pretty thin compared to other cupcakes that I've made, but this didn't keep them from being moist and delicious. I think what I liked the most was that the cupcake wasn't too TOO chocolatey. It was just right.

Then, I followed an easy creme filling recipe except I added a twist and threw in some low fat cream cheese! Once I baked the 32 cupcakes and they cooled for a bit, I used my pastry bag and piper tool to punch a hole in the cupcake and filled it on up. Some of the cupcakes turned out tiny so next time I will fill up the liner with more batter instead of just half way like the recipe suggested.

After filling every cupcake, I waited a good amount of time to let them cool completely before piping on the frosting. This is where I made the boo boo...in my mind I had this vivid image of a reddish colored light and airy raspberry cool whip frosting. This wasn't the case with the finished product. I followed an extremely easy cool whip/pudding frosting recipe and added a container of raspberries to the mixture. Now, I'm not too sure if I used too much milk since I doubled the recipe or all of the water from the fresh fruit made the concoction so thin and runny. But something DEFINITELY went wrong with my not-so-pretty frosting. The color was almost on point and the bits of raspberries after blending really made the frosting look legit and yummy. And it was! Just not so great for piping out of the pastry bag and onto a cupcake...

This is where I was happy that I had extra filling left over! I used the cream cheese filling and added more powdered sugar and a bit of the messed up frosting to still capture that raspberry flavor and look. Although I didn't have enough to icing every single cupcake, it saved the lives of them and STILL were a super hit at work the next 2 days.

Like I mention in my "About Me" section on the homepage of my blog...the greatest feeling comes from the reactions of people biting into a delicious, home made dessert. I felt very content when the cupcakes were gone by lunch time AND THEN by 11am the following day. This just goes to show that if ya screw somethin' up, improvise and the outcome will be even more satisfying :D

This was supposed to be a blog about what not to do when baking, but now I feel that this is the perfect example of what a good baker does when his or her initial reaction is literally freaking out (yes, I freaked out a little bit too much when the icing did not turn out the way I pictured). Just use your natural instincts and knowledge of scratch baking and the finished product will still have people coming back for more!


(Really) Easy Tartufo

You're probably saying to yourself, "what in the WORLD is a Tartufo!?" A little background of a Tartufo: an Italian ice cream dessert that involves NO baking whatsoever. The word 'tartufo' actually means truffle in Italian! It's sort of an odd type of truffle if ya ask me, but that is what makes this a unique, simple dessert. The size is amazing and satisfies your sweet tooth in just a few bites (careful, don't bite TOO soon! As you will see what the finished product looks like at the end of my blog).

I highly recommend this dessert to anyone (like my one roommate *aheemmmm* Diana) that isn't such an expert at baking :D There is no oven involved! Actually...now that I think about it, my roommate just isn't very good at following a recipe (don't worry, this is why you're a good COOK!) She's more of an "I'm going to add whatever whenever I like while I cook" girl which is okay when cooking. Baking is a little more precise though...but I had fun playing around with this recipe as the ingredients really can be used in any amount based on your taste buds.

The main ingredients in Tartufo are icecream, frozen fruit, milk chocolate, cookie crumbles, and melted chocolate (yes only 5 ingredients!!!) When I looked up a basic Tartufo recipe, the author had used chocolate ice cream, frozen chopped cherries, milk chocolate bits, chocolate cookie crumbles, and dark/milk chocolate coating. However, I decided to mix it up a little bit since I (in contrast to the rest of my family) am not a chocolate freak! (Sorry Mom, Dad, and Alex).

My ingredients were strawberry ice cream, frozen raspberries, Hershey's milk chocolate bars chopped up into tiny bits, chocolate (store brand!) graham crackers crushed with the help of my awesome roommates forehead/muscles, semi-sweet melted chocolate chips with the help of more Hershey's chocolate for the hard coating. 

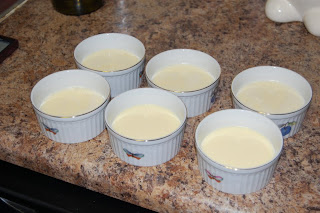
First, you let the ice cream (flavor of your choice, but don't forget to pair it with the just-right frozen fruit) sit out for about 5 minutes to get just a little soft where it's the perfect consistency to scoop out easily. The recipe said 3.5 cups but I did just a bit more--and in my opinion, you could pair the amount of ice cream with the chocolate and fruit however you like it. If you like more ice cream than fruit and chocolate, go right ahead!! No one's stoppin' ya. In my eyes, there is no limit.

When the ice cream is just soft enough, you chop about 1 cup of milk chocolate (I used Hershey's) into fine pieces which you are soon going to mix into the ice cream. My nice roommate decided to be the guest baker and those are his manly arms (no....they are not mine!).


Go ahead and dump that chocolate into the ice cream and begin chopping up your FROZEN fruit of choice! In my case, it was delicious raspberries simply because I think raspberry, strawberry, and chocolate are such a tasty combo! And yup, there is my pale arm...As you can see from the picture, I used store brand frozen fruit as well. That's right, I am a cheap-o.


Then ya add the fruit to the ice cream and milk chocolate mixture and stir it like there's no tomorrow. Actually...don't...then your ice cream will get all milky, gooey, and you won't be able to scoop it into balls silly!


Once you feel like the chocolate and fruit are evenly distributed into the ice cream, set the bowl aside (or in the freezer like I did because I knew the chocolate grahams were going to take a while to crush up finely). Here's where the fun part comes into play. Instead of buying already-crushed-made-for-lazy-folks, I decided to switch it up and buy chocolate graham crackers (yes, store brand...again--hey they taste EXACTLY the same people!) and crush 'em myself! Again...with the fine help of my roommate (the one that likes to help...not the other one...love you Diana!!!!!). This is where the strong foreheads come into play, if you have one handy, I'd suggest using it. Just kidding...you might get a headache...he really didn't use this method for too long!


So, once the migraine hit him, I began using a cup (or you could use whatever is handy to crush the remaining grahams). I used one pack of crackers to roll the scooped ice cream/chocolate/raspberry balls into.


This was the almost finished cracker product!


Then I took the ice cream mixture out of the freezer, used a spoon (I couldn't find my ice cream scooper...which we might not even own...so a spoon worked just fine!) to form and roll the ice cream balls in the crackers.


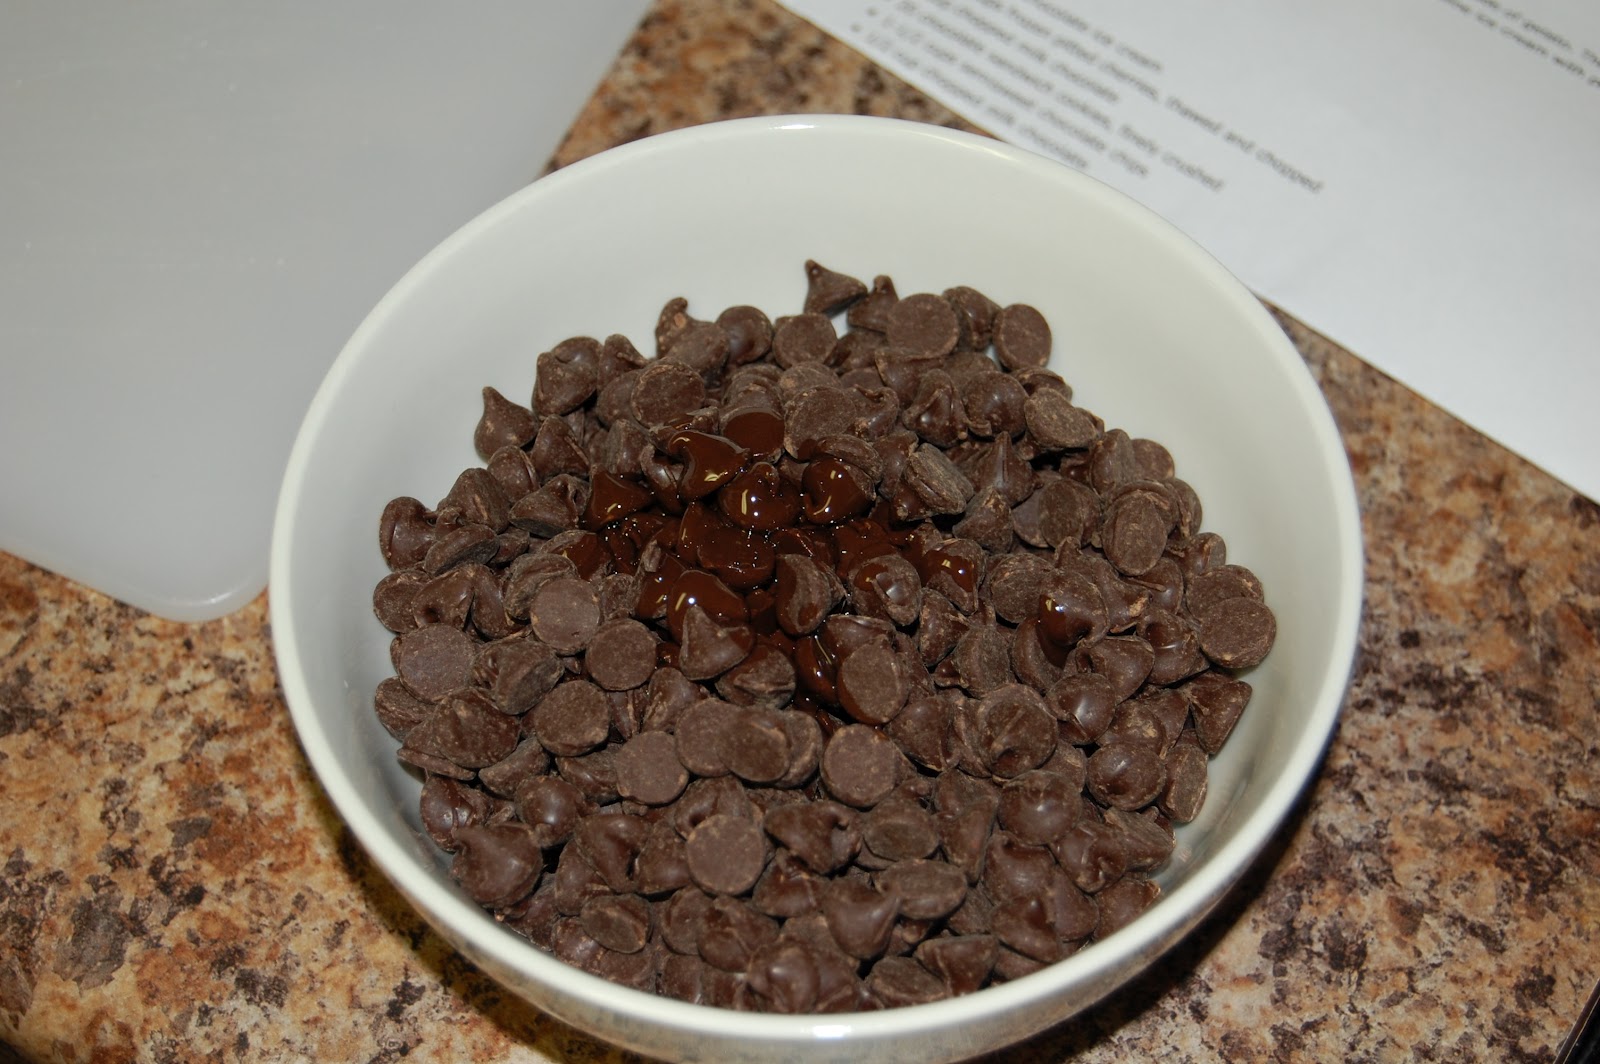
As you can see in the previous picture, the balls were the perfect size to satisfy your sweet tooth! Once you use up all the ice cream mixture, place the Tartufos into the freezer for 2-3 hours until nice and firm. In the microwave, melt semi-sweet chocolate chips with 1 tbsp of oil. Mix in desired amount of milk chocolate to add that extra sweetness. I had to wait a good 20-25 minutes for the chocolate to get to lukewarm so that I could spoon it over the frozen balls.


Drizzle or spoon the chocolate mixture over the frozen ice cream balls and place in the freezer another 2 hours or over night. And there ya have it!!! Easy Tartufo that involves no baking whatsoever!


Oh and don't forget to wait a few moments before biting into one of these...you may get a brain freeze or break a tooth...either way, it won't be fun. So wait 2 minutes, sit back, and enjoy this chocolatey, fruity, bite size (or 2 bites) Italian dessert!

Pair any ice cream with any frozen fruit and chocolate and you will definitely want to make this dessert over and over. Next time, I plan to add nuts or even marshmallows to this delish recipe!

Until next Sunday...see ya!!! Meet me back here to drool over 3 ingredient peanut butter fudge :)

Baked Custard....First Baking Blog YAY!

Shabammmmmm. First baking blog starts now! I'm new at this whole blogging thing! I know when you blog you're supposed to write down whatever comes to your mind. It's kind of difficult for me to do that when I sit at my computer all day at work and send emails to those that expect, of course, good grammar and sophisticated paragraphs. I sort of have the same mind set when it comes to blogging. As everyone knows, yesterday was SUNDAY which meant it was the first day for me to begin my baking themes and the first day to share my life as a baker. I decided to make my first theme of my career Five Ingredients or Less--which obviously means that the 4 desserts that I make this month are going to contain 5 ingredients or less (duhhhh). This may seem simple (which I thought yesterday too when I began making baked custard) but the outcomes are so delicious that the amount of ingredients doesn't even matter anymore.

This literally was the EASIEST dessert that I've ever made in my whole entire life. This of course is set aside from the duties I had as a little girl helping my mother make Yalikmek (however, one might see those duties as stressful and difficult). In fact, my sister and I had the hardest job of the whole Yalikmek making process according to my mom. This was due in large part to the fact that my mom didn't feel like kneading the bread until her arms fell off! She then handed this part off to my sister and I which we deemed as the best time of our lives. Anyways...making baked custard was so simple yet the outcome was pretty desirable.

You literally only use FIVE ingredients--WHOLE milk, a tad bit of sugar, 1/8 tsp of salt (WHAT IS EVEN THE POINT!?), vanilla, and 3 eggs. If you use skim milk, you will not get the same creamy results! But honestly, what is the point of 1/8 tsp of salt anyways!?!


Now once I got all my ingredients settled onto the counter top of my extremely small, cramped kitchen, I began whisking everything together and BAM my custard was ready to be baked. Once poured into each individual cup, you place all 6 cups into a 13x9 inch glass pan and add 1inch of water around the cups. This prevents the custard from burning. I'd like to thank my mother for letting me borrow her beautiful custard cups for this dessert as it is something I wouldn't normally bake.


The baking part of this process takes the longest--45 to 50 minutes--and I actually found that it took about 60 minutes to come to the perfect consistency.


This recipe made 6 impeccable vanilla custard cups (next time I plan on adding a swirl of chocolate into each cup!!!!!).


Now, the recipe originally says you can eat it warm OR cold. I prefer it cold though! Once they were ready to eat, I dug in! The consistency was perfect--creamy and light. My friend (who I owe a HUGE thanks to for taking these pictures...and who will be taking ALL of my pictures to come) added cinnamon to his serving. Yes, yes, I know this isn't RICE pudding (it's okay Martin...) but he said it added an extra touch to the custard! I may have to try that on my next serving...

Welp, that is all for my first baking blog! It's time for the gym...gotta get in beach shape before next Friday!!! OCMD here we come!

PS: I will make sure to look better for the camera next week :)

Thanks S.M.S!

I am so excited to be baking for my roommate's company's happy hour in Rockville, MD on the 25th! Thanks to Select Mortgage Solutions for allowing me to showcase my baked goods during this event and get Liv's Bakery finally underway. Pictures and more blogging to come after this event!