A Taste from Heaven

You can't get sick from eating too much homemade chocolate/coffee whipped cream right off of the beaters!

That's right, I have made homemade whipped cream a few times so far in my blogging world but never have I ever made homemade chocolate and coffee whipped cream! This really put the icing on the cake (ha get it?) of my last under 200 calorie dessert. I know it is bad to lick the beaters once finished baking a delectable dessert; however, I somehow always break this law of Baking 101. Ever since I was younger, I was told that raw eggs are bad for you and you should NEVER EVER lick the cookie dough batter out of a mixing bowl or off of the beater. Somehow, my mom would still continue to let me do so :)

But that law doesn't exist when there are no raw eggs in the batter. In this case, I definitely licked the beaters clean (and the spatula) once I was finished whipping up my own version of chocolate coffee whipped cream. 


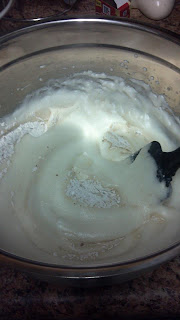
Homemade whipped cream is THE BEST because all you need is a pint (depending on how much you need to frost) of whipping cream, 2-3 tbsp of sugar, and 1 tsp vanilla! All I had to add was a tsp coffee extract and some unsweetened cocoa powder based on my judgement. I whipped it up, tried it a few times to make sure it was delish, and VOILA!

Ever made angel food cake from scratch?? You would think it was a huge pain in the butt but actually, if you use egg whites from the carton, it is a piece of cake! (HA!) I adapted this recipe from someone's blog (she is an amazing blog writer) who tried angel food cake cupcakes. I cut the recipe in half.

Angel Food Cupcakes (makes 36 cupcakes)


12 large egg whites (1 1/2 cups)
1 1/2 teaspoons cream of tarter
3/4 cup granulated sugar
2 teaspoons vanilla extract
1 3/4 cups sifted powdered sugar (sift before measuring)
1 1/8 cups sifted cake flour (sift before measuring)
1/4 teaspoon salt

Let egg whites sit at room temperature for about one hour before beginning. While eggs are resting, measure out powdered sugar and flour, then sift powdered sugar, flour and salt together. Set aside. Line a cupcake tin (or two) with cupcake liners.

Preheat oven to 350 degrees F and place rack in the bottom third of oven.

Using an electric mixer, beat egg whites until frothy. Once frothy, add in cream of tarter, then beat at medium speed until soft peaks form. This took me about 5-6 minutes. Gradually add granulated sugar with the mixer still on medium speed, continuing to beat until egg whites thicken a bit more with opaque, soft, droopy peaks. Once there, beat in vanilla extract.

Remove the bowl from the mixer and sprinkle 1/4 of the dry ingredients over the egg whites. Fold gently with a spatula until combined completely. Continue with the rest of the dry ingredients – I did this in three increments.

Once batter is smooth, use a 1/4 cup measure to pour heaping scoops of batter into each liner. Bake for 18-19 minutes, or until tops are golden brown. Let cool completely, then frost as desired. I frosted mine with a simple fresh vanilla whipped cream, using 1 pint of whipping cream, 2 tablespoons of sugar, 1 teaspoon of vanilla extract, and beating until thickened.

What is important to do: When making homemade angel food cake and reading other people's comments/concerns of the general recipe (not just on this blog), I discovered that folding in the flour, powdered sugar, and salt mixture is probably crucial. Some recipes that I saw, it didn't mention folding in this mixture, but rather just blending it with the hand mixer (or big blender if you have one). I read how some people's cakes didn't rise and turned out completely flat. Folding in the dry ingredients doesn't take long and makes for an easy clean up! Oh and don't leave out the cream of tartar as this ingredient is used as a thickener and helps things rise. Also, I've read that you must use cake flour--yes, this is much different than all purpose--since it is much more fine.  


What I changed and added: Since this was a mocha angel food cake, I added coffee extract and unsweetened cocoa powder to the batter. Next time, I would probably leave out the vanilla extract in this recipe if I am going to use another extract. The batter was a little thin since I had both extracts in there. I discovered that using already prepared egg whites was SO MUCH easier than cracking and separating 12 large eggs themselves. 


What I will do next time: Next time, instead of adding the unsweetened cocoa powder to the dry ingredients and then folding this mixture into the egg white mixture, I will add it to the egg white mixture which gets blended with the hand mixer. Since it wasn't blended in, there were little chunks of cocoa powder in the finished batter product. This didn't matter once baked, but it's something I recommend doing if you make this recipe :)

Angel food cake cupcakes are so great, light, and surprisingly healthy. Not to mention they just melt in your mouth. You can pop 'em in your mouth like munchkins! I could have put more batter in each liner--my ongoing flaw to making cupcakes :(-- which would have made them bigger but the cool whip on top made up for the extra space. These HAVE to be just or less than 100 calories each (especially the way I made them). How can you pass something like this up!? 

Ya can't.


P.S. I am going to make all 8 projects in my very first cake decorating book that I purchased from Barnes and Noble! I will bake these over the next couple of months so stay tuned!


Cheers!
 

"D" for Dumbo!

D for Dumbo and DANNY! 

I never thought that themed cupcakes would be so FUN! My dear friend Angie's son, Danny, turned 5 over the weekend and he desperately wanted to throw a circus birthday party to celebrate. This was SUCH a fantastic idea as Angie had sooo many good ideas to incorporate the theme into the party. There was a photo booth, moon bounce, different circus games, circus snacks like popcorn, cotton candy, and animal crackers, and finally, MY CIRCUS CUPCAKES! 

A little bit of nostalgia: When you hear this theme, what do you immediately think of?? Elephants, trapezes, jugglers, rides, snacks like the previously mentioned, ALL kinds of other animals, etc. I never really thought about how fun circuses can really be and of course this brought back some childhood memories. Although my mom purposely avoided York Road during that infamous Maryland State Fair week in August, I still got the joy of attending the fair once I was old enough to walk on over, and the memories are still fresh in my mind. Unfortunately, this fair sometimes creates the image of trash, dirtiness, and carnie central, but that doesn't stop my imagination from remembering all the good scents and images that a circus brings.

Getting back on track, Angie was determined to tie everything into the circus theme of the party. Of course this meant that I was going to be making circus cupcakes. **By the way, this was my first, real cupcake order and I was so pumped**. It saddened me that my business cards didn't come in before the weekend began because I wasn't able to hand them out to the parents. This would have been the PERFECT opportunity to reel the mothers into my new home-based baking business, but it just wasn't possible. I made Office Depot pay for this though by giving me my cards for free once they came in yesterday!


Anyways, let's get to the cupcake making of this whole circus experience. Angie was kind enough to search for decorations she admired on the cupcakes and since it was my first order, I wanted it to be exactly what she wanted for her son. She came across a picture of a variety of circus cupcakes on Google and they were so interesting, I just couldn't resist. The batch that I saw had lions, other animals made from fondant, circus tents, popcorn, balloons, and other circus related items. I asked her if she had to choose three, which would she choose. Based on her executive decision, I made the red and white circus tents, popcorn, and balloon decorated cupcakes. These were so easy and pretty detailed at the same time. Since my Oreo-filled vanilla cupcakes were such a hit the last time, I made these, used a generic butter cream icing recipe, and decorated them accordingly! I LOVE piping icing so for the balloon cupcakes, I did them like so, added colorful sprinkles, and added the gumballs to represent balloons. The other two had spatula-spread butter cream and decorations to represent red and white tents and popcorn buckets. 

How I improvised a tad: I have never used fondant before and since this was a last minute change to the tents (the fruit roll ups I was going to use for the stripes had writing on them), I decided to run to Michael's to buy sugar paper sheets. Red sugar paper worked miraculously by simply cutting them into triangles and sticking them on the butter cream. I also didn't feel like making more icing for a dollop in the center of the tents so I found chocolate morsels in my cupboard, melted a few, and made circles in the center. I cut plain printer paper for the flags and added a "D" for Dumbo and Danny! I also didn't have yellow food coloring but I did have yellow icing color which I used to represent butter on the marshmallows (popcorn). 

What I need to work on: I need to work on putting a tad more batter into the cupcake liners before baking. I'm deathly afraid of putting too much and causing the cupcakes to overflow, but nicely domed cupcakes would have worked better for the tents. I need to get over my fear of overflow!!!! 

New addition to the family: I bought a new cupcake stand at Michael's which fits 23 cupcakes and/or muffins, or any other circular dessert. I love my new addition to my baking business!!

All-in-all the cupcakes were a hit and the kids were SO surprised when they got to the cookie-filled center. It was sugar high central up in Angie's house!! At least they got to jump it off in the moon bounce :)

Cupcake making in action! Cutting the marshmallows and sticking them together makes for a good popcorn effect
Final product for my very first cupcake order!

That's all folks and stay tuned for my completely homemade (first time ever) Mocha Angel food cake next Sunday! 

P.S.: Ever feel the need to be dorky once in a while?? I did!


Cheers!!

Peach Cake for the Baby!

The baby actually didn't eat the cake...but he was the hit of the show Sunday night at the cookout! Check him out here with his new plaid shorts and cool sandals! This is my nephew Shawn by the way...cutest 3 month old everrrrrrr.


My parents had a cookout Sunday with all the family because many of them hadn't met Shawn yet. It just so happened that this was a Sunday that I didn't have a "under 200 calorie dessert" planned since there are five Sundays this month. I decided I was going to take the weekend off from baking but nope, instead I made the dessert for the party! I stuck with the summery fruit--peaches--and made a peach cake. The recipe at first glance seemed like a lot but I actually really enjoyed making this dessert. My mom always makes a peach cake during one of our summer cookouts and I KNEW she was going to choose this dessert out of the four choices I gave her.

Just so everyone knows, I saw these four recipes that caught my eye when searching for light, cookout desserts.

Tiny Terrific Tiramisu
Berry Bonanza Blast
Pondering About Pavlova (because I've never heard of it)
Peach-Puffed Cake

Now those obviously aren't the exact names...or are they? Check out the links to some interesting summery desserts that I found along my journey!

Anywho, I presented these options to my mother and just knew she was going to pick the peach cake (sorry Mom, but we know how much you love your peach cake recipe :D) But I was sort of relieved because that meant I didn't have to buy whipping cream for the third time in just a month for the Pavlova! (What the heck is this anyways?).

This layered cake was full of flavors that fit so well together like puzzle pieces. You got your cinnamon that compliments the sugar in it's usual fashion. Then you got your sweet/salty combo of chopped pecans and peaches. In the 13x9 inch pan that I used since I doubled the recipe, you had a layer of cake, layer of peaches, layer of cinnamon/sugar, layer of cake, layer of peaches, layer of cinnamon/sugar, nuts. Every ingredient complimented each other so well and it came out very nice.

What I will make sure to do next time: I definitely didn't buy enough peaches and I should have known better when I looked at the recipe. It called for 3 peaches but since I doubled the recipe, I bought 6. I probably could have used 8 once I looked at the completed cake. I still had absolutely no complaints and it was gobbled all up by noon the following day at work!

I was pretty worried when the cake had to be in the oven for a little over an hour. For the original recipe, you bake for 45-55 minutes. The outer parts of the cake were golden but the middle was still gooey. However, once I took it out, let cool for 10 minutes, covered with foil, everything got extremely soft and I officially decided that it came out the perfect consistency :) Sadly, I did not get a snap shot of the finished cake. We were too busy chowing down!

What not to do: Whatever you do, do not bounce a baby around right before you plan on eating this cake (or any food for that matter) if you know what I mean!

Stay tuned for MY FIRST OFFICIAL ORDER NEXT SUNDAY!! You'll have to wait completely homemade Mocha Angel Food cake!

Cheers!

P.S. Pavlova is a dessert named after Anna Pavlova, a Russian ballerina in the late 1800's. It is a meringue cake topped with whipped cream and some type of fruit. Well, duh, that explains it!

Layer numero uno

Top view!


Right before going into the oven.


Don't Use a Hand Towel to Pick Up Hot Things!

HAPPY WEEDS DAY! 

That would mean the show silly. So today I decided to change my plans up a little and instead of making the orange raspberry souffles, I made a summery lemon tart! My roommate has been saying that I should make lemon bars lately, but the traditional lemon bar would mean more than 200 calories and that doesn't come into line with this month's theme! So I came across Betty Crocker's (Mystery-in-a-Box woman!) fresh lemon tart. The original recipe had a frozen blueberry garnish, but I decided to leave this out as I forgot corn starch :( I had fresh blueberries laying around so I decorated with them instead!

This dessert was extremely easy and the oven was only involved when baking the crust. The filling has only fat-free milk, lemon pudding and pie mix, and cool whip! It is cooling now as we speak so it will be ready to eat later while we watch the 2nd episode of Weeds!! 

What I will change next time: Always make more than enough crust! The recipe called for 1.5 cups of crushed vanilla wafers, 1 tbsp of melted butter, and 1 beaten egg white for the crust. I followed this exactly and ended up with not enough crust for the tart. I suppose I could have gone back after I pressed the crust into the bottom of a pie pan and made more crust to build up the sides, but I decided to leave it as it is and just cover the bottom of the pan. Hey, less calories and fat! Next time I will definitely make MORE than enough crust because I now know that you can never have too much :)

Now, I haven't tried the tart yet, but I have tried the filling from the bowl. The crust HAS to be delicious because it has vanilla wafers in it and you can never go wrong with Nilla Wafers! When baking the crust, do not try to pull it out of the oven with a hand towel...I ended up burning my thumb! Yes it was a dumb idea because I have plenty of pot holders...*sigh*

What I think I will love about this dessert: The serving size from the original recipe is 130 calories; however, that is with the blueberry garnish and more crust. I expect each serving to be about 100 calories or even less without that. The filling is so light and refreshing because, duh, lemon flavoring is ALWAYS refreshing and the cool whip tones the lemon down a bit. I've never tried the flavors of blueberry and lemon together, but I am definitely all about trying new and different things. 

My next mission: This week I am going to start researching what ingredients actually DO when added to a recipe. Obviously flour thickens, milk/water thins, baking powder makes things rise, but my next mission is to really research all different ingredients so that I can, one day, write my own unique recipes and let my imagination take over. After all, the biggest question I will need to ask myself when opening up Liv's Bakery is, "What is going to set me apart from others?" My plan is to mix flavors together that completely slip people's minds, think outside the box and make unique recipes, and spice up my decorations and presentations so that my bakery can become successful. Let the reading begin!!

I do not have a dessert planned for next Sunday since there are 5 Sundays this month. That shouldn't stop me from continuing my research and blogging about it though! The following week I will be making a Mocha Angel Food cake and I plan to make that from scratch this time! No more Betty Crocker mystery-in-a-box for me. 

Cheers!
 

Since I've Started My Baking Blog...

 5 ingredient vanilla custard

 Tartufo- Chunky strawberry ice cream, milk chocolate bits, raspberries, chocolate cookie crumbs, and topped with a milk chocolate drizzle

 A simple chocolate cupcake with raspberry cream cheese icing

 Peanut butter cupcake with peanut butter frosting and a touch of chocolate

 Old fashion red velvet cupcakes with cream cheese icing

 First-timer Baklava

 Chocolate cupcake with chocolate chips and vanilla butter cream icing. Oh and that touch of left over Nutella butter cream icing :)

 Good ol' vanilla cupcake with Nutella butter cream frosting

 Cinna-sugar biscotti with slivered almonds

 Tres Leches Cake with homemade whipped cream

 Mini white chocolate raspberry cheesecakes

Independence Day Angel Food with homemade whipped cream and berries

And many, many more to come! Cheers!

Mystery-in-a-Box

Happy Late Birthday America!

So I've never actually made an Independence Day dessert before...but this one is an old time favorite! I watched my mom make this almost every year for the 4th of July and as much as I DISLIKE...well I would use another word but it is too strong...making anything out of a box, this is one of those cakes that you just feel so bad making homemade. For the 4th this year, I decided to try out the red, white, and blue angel food cake that always screamed "Get in my belly!" when my mom made it for cookouts. It's oh so simple (mainly because it's made out of a box) and all you do is add water. Literally, so sad, but water is the only other ingredient required besides the Betty Crocker mystery in a box. Honestly, how do they get a powder out of this recipe?!?!?!:
  • 1 3/4 cups sugar
  • 1/4 teaspoon salt
  • 1 cup cake flour, sifted
  • 12 egg whites
  • 1/3 cup warm water
  • 1 teaspoon orange extract, or extract of your choice
  • 1 1/2 teaspoons cream of tartar
It doesn't make sense to me whatsoever, but hey, it's the taste of fluffy clouds!!

Anywho, I guess Betty Crocker holds the ultimate secret to condensing this recipe into a powder-based sponge cake that melts in your mouth when combined with homemade whipped cream, strawberries, and blueberries. Going back to my point about feeling bad after making angel food cake from scratch, I know I would if I wasted 12 egg yolks. I wonder if you could find the equivalent of 12 egg whites and the number of cups it would make. Ah ha! According to the American Egg Board *does the Scooby growl* 4-6 egg whites is equal to a 1/2 cup. So I guess I could buy egg whites in a carton and not feel so bad about making homemade angel food cake! Definitely going to try that next time...

So this boxed heaven turned out to be the best way to go on the 4th as my roommate and I were scrambling to make deviled eggs (that was her job) and bake this cake in order to beat the storm at the cookout we were going to. What rain?! Below are the steps to the spongy, light, airy, sweet, and tart 4th of July dessert:

-Open the box to Betty Crocker's mystery (that just so happened to be fun-fetti style powder)
-Dump the powdered egg white concoction into a mixing bowl
-Measure out 1 and 1/4 cups of tap water
-Gently pour the water over the mystery powder
-Blend well with an electric mixer for 1.5 minutes
-Pour magically fluffy egg white-like substance that you have now made with the help of water into an angel food cake tube pan
-Put it in the oven for about 40 minutes until the top is golden brown and cracks feel dry
-Don't forget to watch it rise magically with the help of baking powder??????? This ingredient is actually still a mystery...
-Immediately turn pan upside down on top of a drinking glass and wait for it to cool completely
-Release cake from pan onto a plate
-Make homemade whipped cream with a pint of whipping cream, 3-4 tablespoons of sugar, 1 tsp vanilla
-Spread all over the top and sides of the cake
-Decorate with desired fruit and enjoy!!!

Was I too specific on how to make the mystery in a box? :D

Don't do what I did: When I pulled the cake out of the pan, it just so happened that some cake was missing from the one side. Where did it disappear to?? No clue because it wasn't left in the pan! When I spread the whipped cream all over, it kind of sunk to one side a bit :( Once we finally arrived to the cookout and got around to eating the cake, the cool whip on that one side decided to weight the cake down even more so it was more lopsided.

Oh well, it was more delish than ever AND I even got to enjoy the mystery behind Betty Crocker's magical just-add-water cake powder. That's all folks!

PS: Can you tell yet how much I dislike making boxed desserts yet? 


Raspberry Extract=Da Bomb!

It's "Desserts Under 200 Calories" Month! 

This might be one of my favorite months yet. Yeah, yeah, I know I don't have too many blogging months under my belt YET, but these easy, light desserts should do the trick for some people like myself who are trying to stay slim for the summer months.

Don't Forget!! If you want to see any of the recipes I use and tweek for ANY of the desserts featured in my blog posts, don't hesitate to ask! I just don't feel like posting every single full recipe within each blog.

Anywho, this past Sunday was White Chocolate Raspberry Swirl Cheesecake Bars day. These "bars" were around 172 calories a piece and include one of your favorite summer time flavors--Raspberry.

What I Changed:  First off, I split the recipe in half because it originally made 32 "bars." Since I'm making all of these desserts every Sunday mostly for my blog and to share my experiences, I don't need to make the full recipe of really anything. I also changed up the presentation of these so-called "bars." Instead of using a 13x9 inch rectangular pan to bake the cheesecake in, I used cupcake pans! I decided to make mini cheesecakes instead! I've seen this done before and they just look so cute! Not to mention they are the perfect size to satisfy that sweet tooth. The recipe also called for 1/4 cup raspberry puree extracted from thawed, frozen raspberries. I just couldn't seem to squeeze the juice out of the raspberries (maybe they weren't fully thawed) so I thought, what the heck, I'll just leave it out and add a bit more raspberry extract. And this is exactly what I did! I also used 1/3 reduced fat cream cheese and light sour cream :)

The recipe actually made only 12 mini cheesecakes which was the perfect amount. They are already gone!

What I Would Change Next Time: MAKE EXTRA CHEESECAKE BATTER IF YOU'RE CUTTING THE RECIPE IN HALF! Each mini cheesecake could have used an extra dollop of batter on top of the crust. I also think I pressed a bit too much crust in some of the minis but since the crust was completely homemade and delish, no one complained.

Note: There really wasn't a need for the 2 baking squares of melted white chocolate. You could barely taste it! (I guess that's why they chose to leave out that part in the actual title of the recipe!) I tasted the batter about 5 times while adding the extract because I wanted to make sure there was enough and not TOO much flavor. Once baked, you could definitely taste the tangy, raspberry flavor and it wasn't a big deal that I left out the frozen raspberry puree.

These mini cheesecakes are easy to make and actually keep for a while. You can store them in an airtight container for up to a week or freeze them for later use! I might just make these for the fundraiser that I will have my own booth at in August! Wooooo thanks to Select Mortgage Solutions (you better not cancel this time!)

Cheers! And don't forget to check back in after the 4th to see pictures of my Independence Day Angel Food Cake!

Before going in the oven

Finished mini cheesecakes